Halloween Candy Bowl
Halloween is just around the corner, and what better way to add a touch of festivity to your home than with a Halloween candy bowl? With a few affordable supplies from Dollar Tree, you can create a unique and eye-catching...
]]>Halloween Candy Bowl
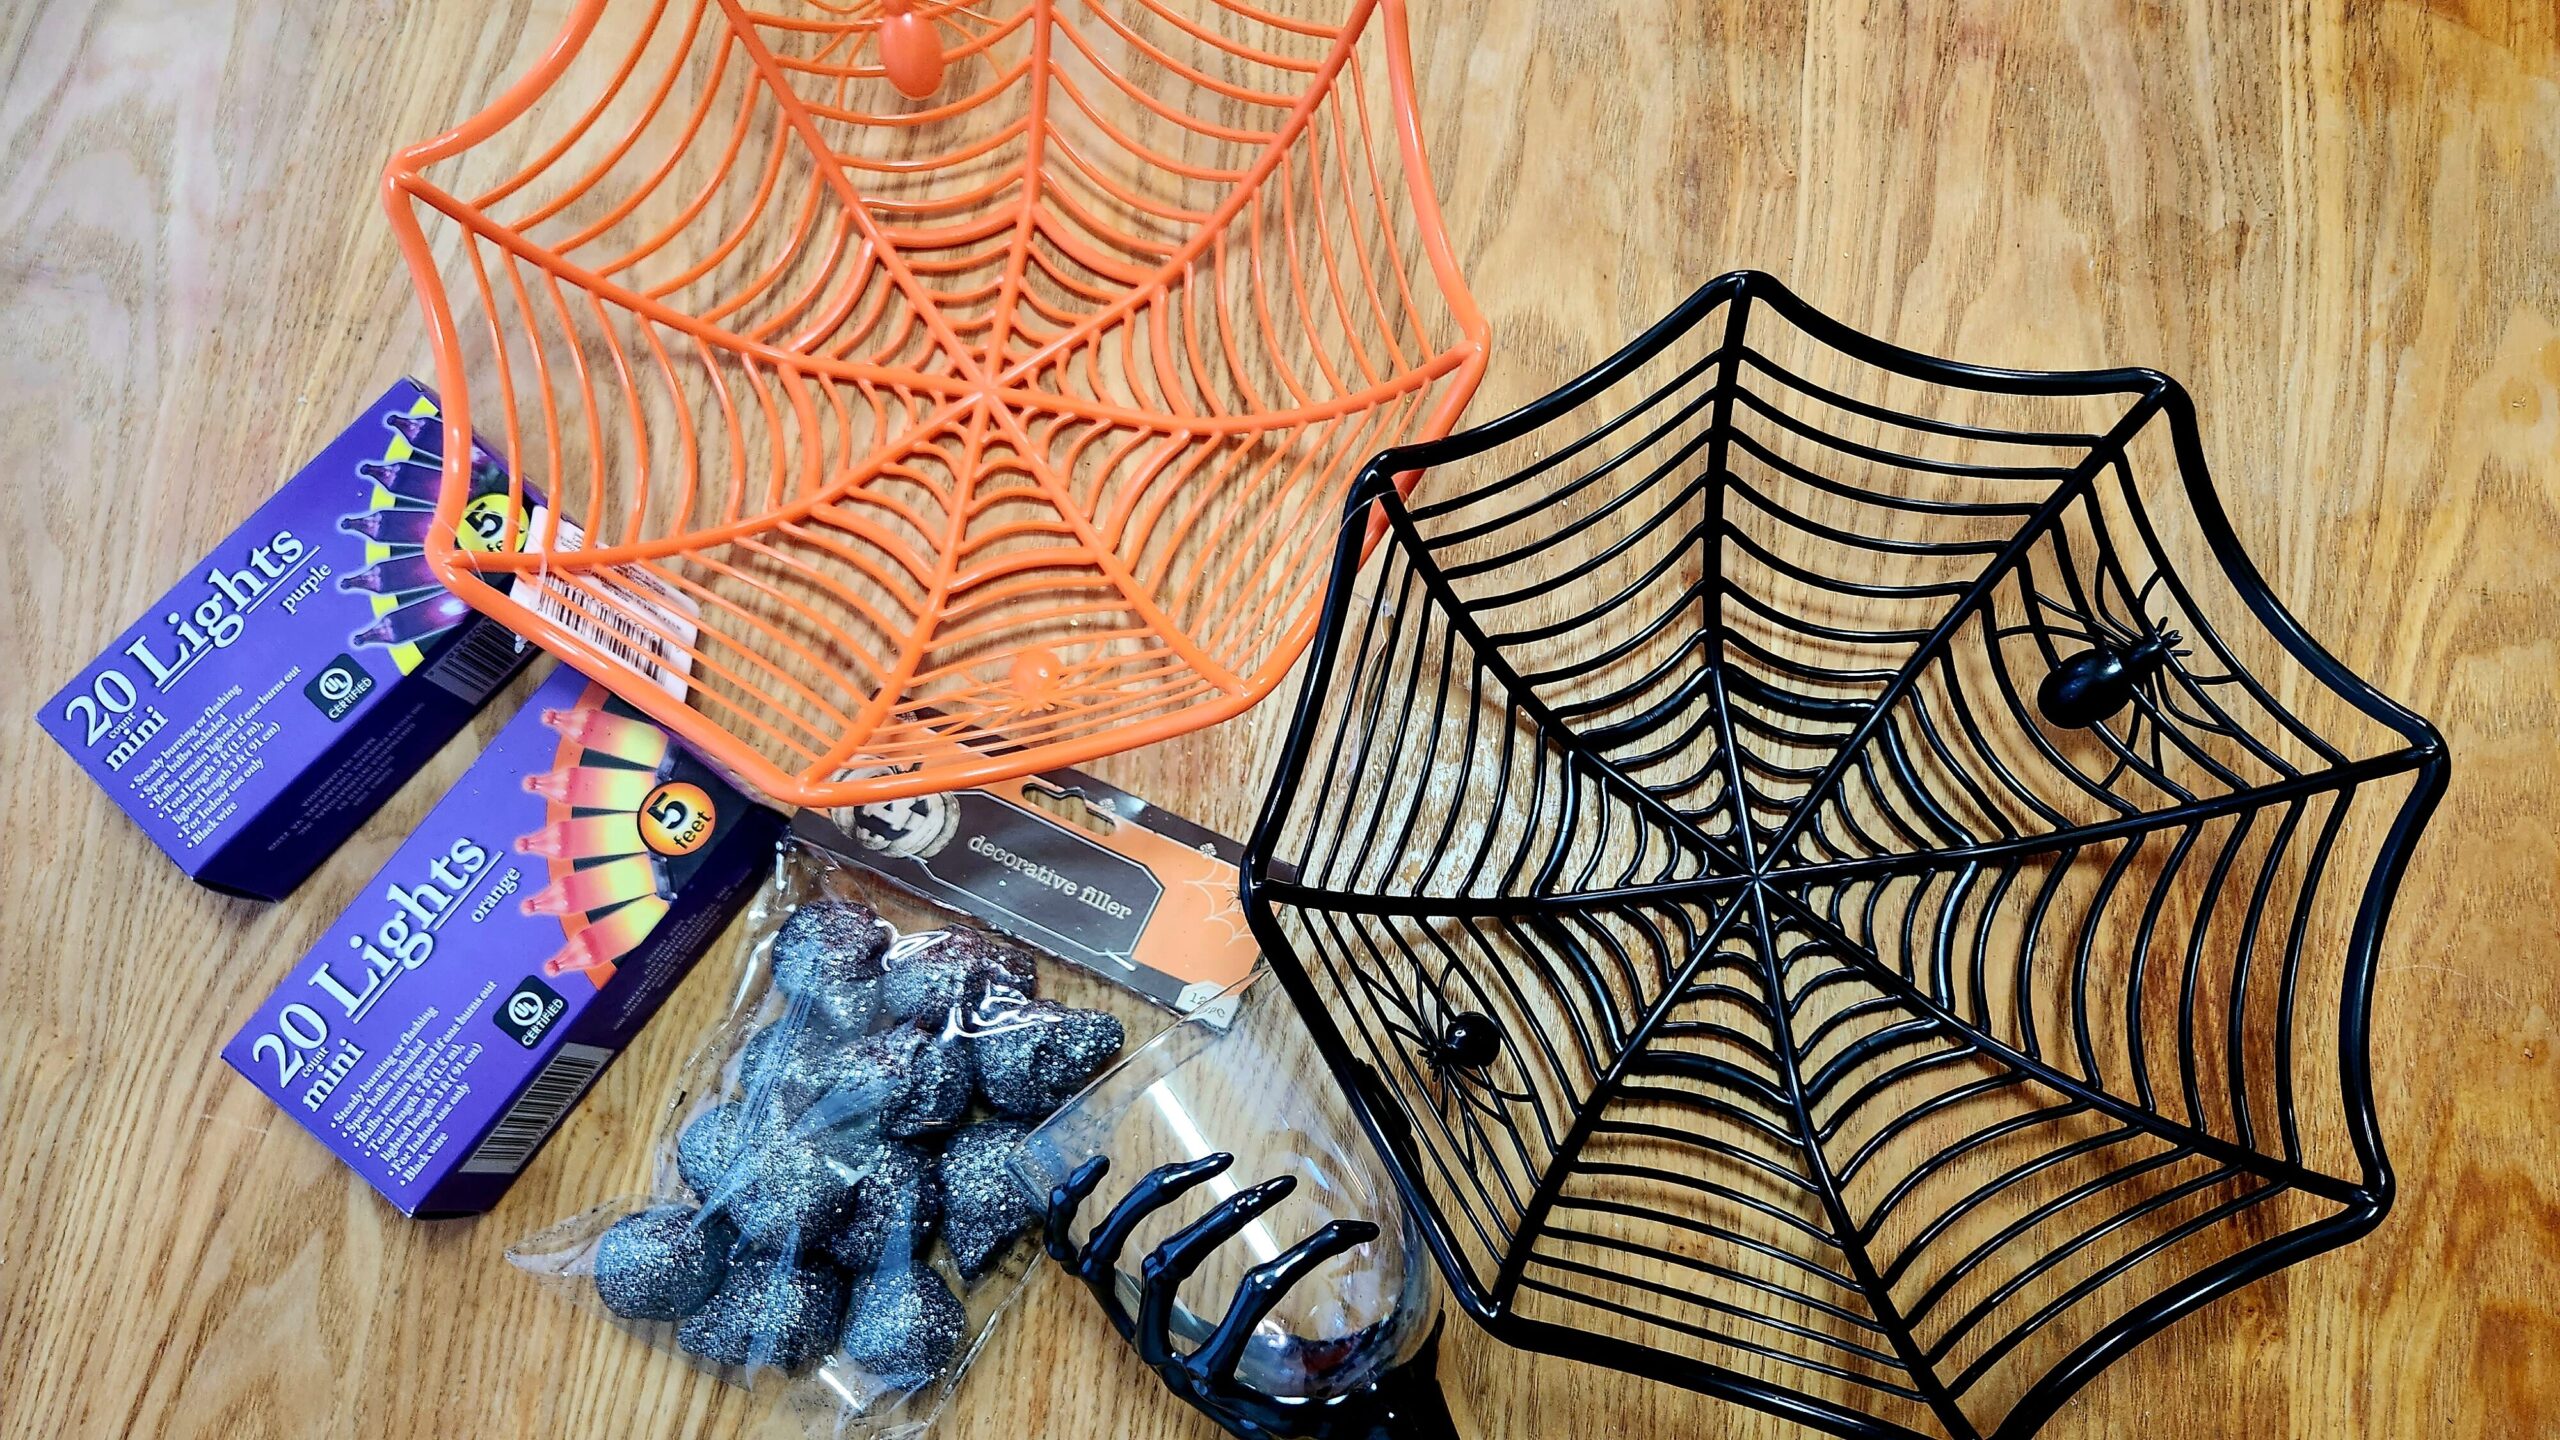
Halloween is just around the corner, and what better way to add a touch of festivity to your home than with a Halloween candy bowl? With a few affordable supplies from Dollar Tree, you can create a unique and eye-catching candy bowl that will impress your trick-or-treaters. In this blog, we’ll show you how to transform two spider web-looking bowls, a package of decorative filler skulls, a faux wine glass, a hot glue gun, and some delicious candy into a captivating centerpiece for your Halloween treats!
Materials You Will Need:
- Two plastic Halloween web-shaped treat bowls (black and orange)
- One package of skull decorative filler
- One skeleton-hand champagne flute
- Hot glue gun and glue sticks
- Assorted Halloween-themed candy
Step 1: Prepare the Supplies
Gather all your supplies from Dollar Tree and make sure you have everything you need for the project. Double-check the glue gun to ensure it’s functioning correctly and gather your chosen selection of Halloween candy to fill the bowl.
Step 2: Assemble the Base
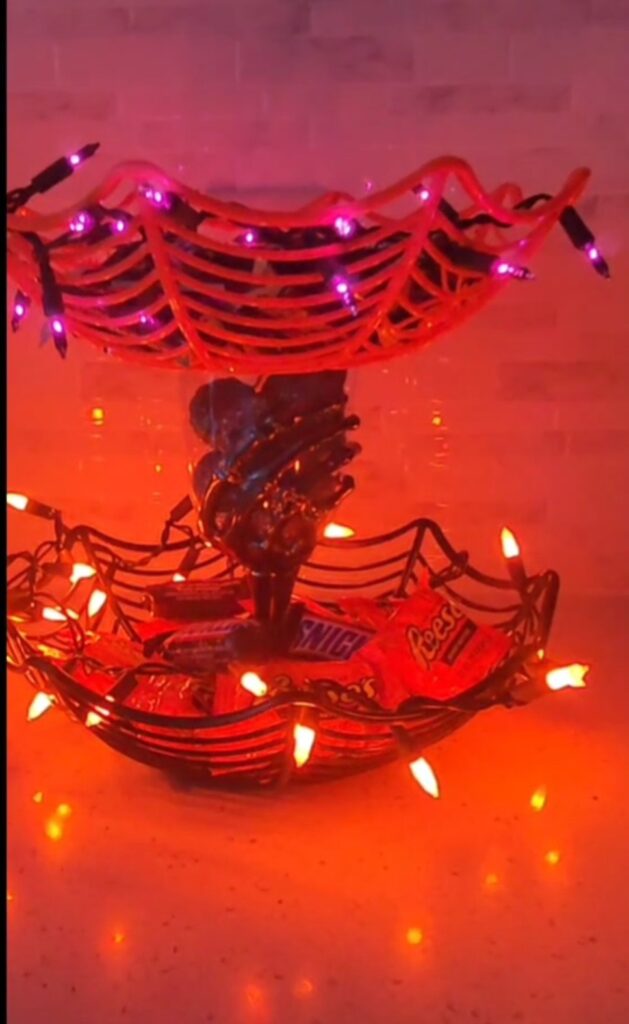
Using the hot glue gun, carefully attach the rim of the faux glass to the spider-web bowl to the base. The spider web pattern should be visible on the outside of the bowl. Hold the pieces together firmly until the glue sets and they are securely attached.
Step 3: Flair with Filler
Fill the skeleton hand champagne flute with skull decorative filler from Dollar Tree. The skeleton champagne flute will serve as a pedestal for displaying your spooky candy. Place the other bowl on top of the rim of the faux glass using the hot glue gun.
Step 4: Embellish and Fill with Candy
Now it’s time to get creative! Enhance your Halloween candy bowl by adding additional detailing if desired, like the purple and orange Halloween lights. Consider incorporating other Dollar Tree Halloween decorations to personalize your creation.
Step 5: Display the Halloween Candy Bowl and Enjoy!
Find the perfect spot in your home to showcase your handcrafted creation. Whether in the foyer to welcome trick-or-treaters or on the dining table during a Halloween party, your unique candy bowl will undoubtedly become a conversation starter. Enjoy the delight on your guests’ faces as they indulge in the sweets you’ve thoughtfully provided.
Creating a Halloween candy bowl from Dollar Tree supplies is not only budget-friendly but also a fun and rewarding DIY project. Let your imagination run wild, experiment with various decorative elements, and make this Halloween truly spooktacular with your one-of-a-kind candy bowl creation!
]]>Fall Pumpkin Centerpiece
If you’re searching for a simple and cost-effective way to spruce up your home decor, this blog post is for you! I’ll guide you through the process of creating a stunning fall pumpkin centerpiece using flowers from Dollar Tree and...
]]>Fall Pumpkin Centerpiece
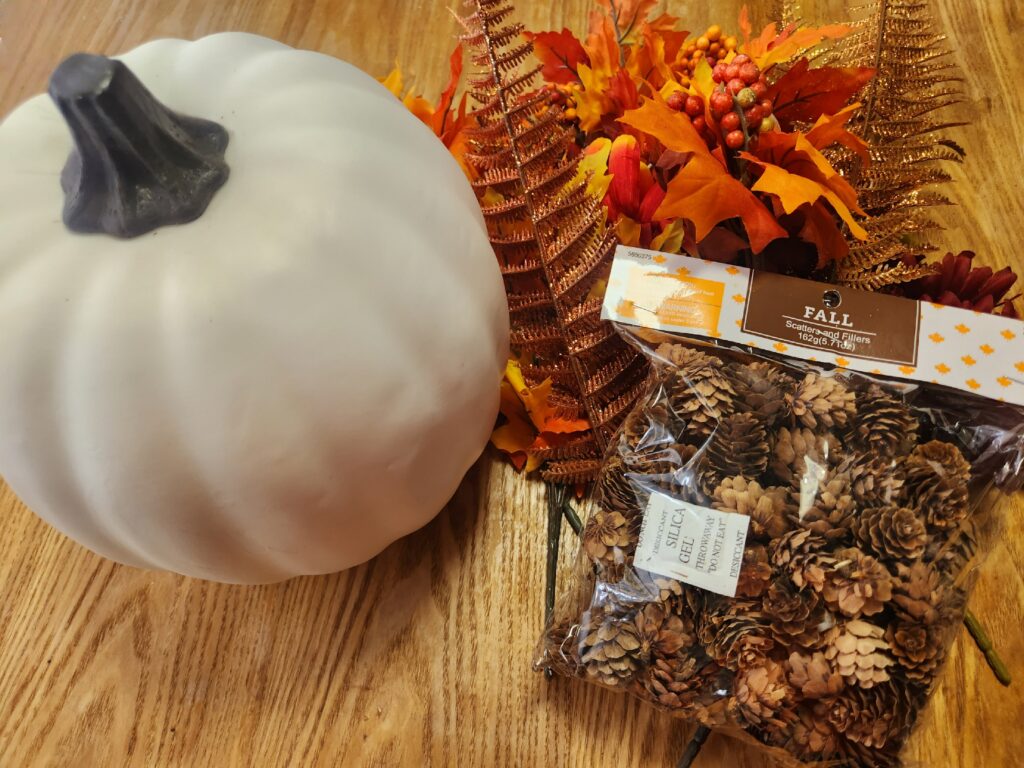
If you’re searching for a simple and cost-effective way to spruce up your home decor, this blog post is for you! I’ll guide you through the process of creating a stunning fall pumpkin centerpiece using flowers from Dollar Tree and a Styrofoam pumpkin from Hobby Lobby. The best part? You won’t need any glue or scissors, making this DIY project easy and hassle-free. Let’s dive in!
*Disclosure: This post may contain affiliate links, which means that I get a commission if you decide to make a purchase through my links, at no cost to you. Please read full disclosure here.
Materials You’ll Need
- Styrofoam pumpkin from Hobby Lobby
- Assorted flowers from Dollar Tree
- Mini pinecones (optional)
Step 1: Choosing Your Flowers
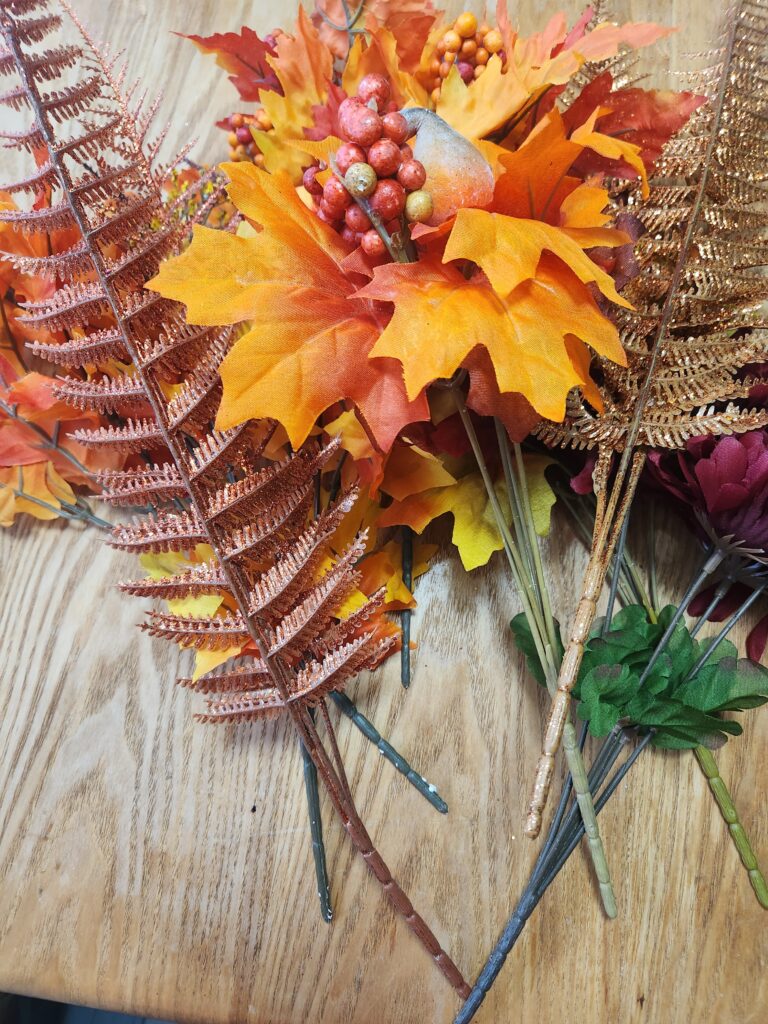
Pay a visit to your local Dollar Tree and browse their collection of flowers. Look for a variety of colors and styles that will complement the autumn theme of your centerpiece. Since no adhesive or cutting is involved, it’s best to select flowers with stems that are long enough to be inserted into the Styrofoam pumpkin.
Step 2: Organizing Your Flowers
Take a moment to organize your flowers and decide which ones you’d like to use for your centerpiece. Group them by color or create a mixed arrangement – the choice is yours.
Step 3: Inserting the Flowers
Now comes the fun part! Simply take each fake flower and insert its stem into the Styrofoam pumpkin. Play around with the positioning and angles until you achieve the desired look. This step requires no glue or adhesive. The flowers should fit securely into the foam, allowing for easy adjustments if needed.
Step 4: Mix and Match
Feel free to mix and match different flower types and colors to add an extra touch of visual interest to your fall pumpkin centerpiece. By combining various styles, you can create a unique and eye-catching display without any additional tools or materials.
Step 5: Display and Enjoy!
Once you’ve finished inserting all the flowers into the Styrofoam pumpkin, find the perfect spot to place your fall pumpkin centerpiece. It could take center stage on your dining table, become a focal point on a sideboard, or add a touch of charm to a coffee table. The possibilities are endless!
Sit back, relax, and admire your beautiful creation. With just a little investment of time and a little over $20, you’ve managed to create an impressive centerpiece that looks far more expensive than its humble materials would suggest.
Remember, the simplicity of this DIY project allows you to easily swap out the flowers with new options as the seasons change. You can create festive centerpieces for Halloween, Thanksgiving, or any other occasion all year round.
So, get ready to impress your guests and elevate your home decor with this effortless and affordable fall pumpkin centerpiece crafted from Dollar Tree flowers and a Hobby Lobby Styrofoam pumpkin. Enjoy the process of creating something beautiful without the need for glue or scissors. Happy decorating!
]]>Creative Baby Shower Gift Basket for a Girl
*Disclosure: This post may contain affiliate links, which means that I get a commission if you decide to make a purchase through my links, at no cost to you. Please read full disclosure here. Introduction If you’re looking for the...
]]>Creative Baby Shower Gift Basket for a Girl
*Disclosure: This post may contain affiliate links, which means that I get a commission if you decide to make a purchase through my links, at no cost to you. Please read full disclosure here.
Introduction
If you’re looking for the perfect gift to give at a baby shower, this Baby Girl Gift Basket is just the thing! It includes everything a new mom needs for her new baby, like washcloths, clothes, and baby mittens. This gift basket is a great idea for anyone who has recently had a baby girl.
Buy a round basket.
Baskets are available in many sizes and shapes, so it’s easy to find one that fits your needs. Baskets can be made of plastic, wicker, rattan, or bamboo. They’re available at your local Walmart, Dollar Tree, craft stores, and online.

Baskets are a great gift for baby showers because you can use them for other purposes after the baby shower is over! You could keep toys or books in the basket until your child is old enough to play with them properly, then fill it with blankets when they’re ready for bed at night.
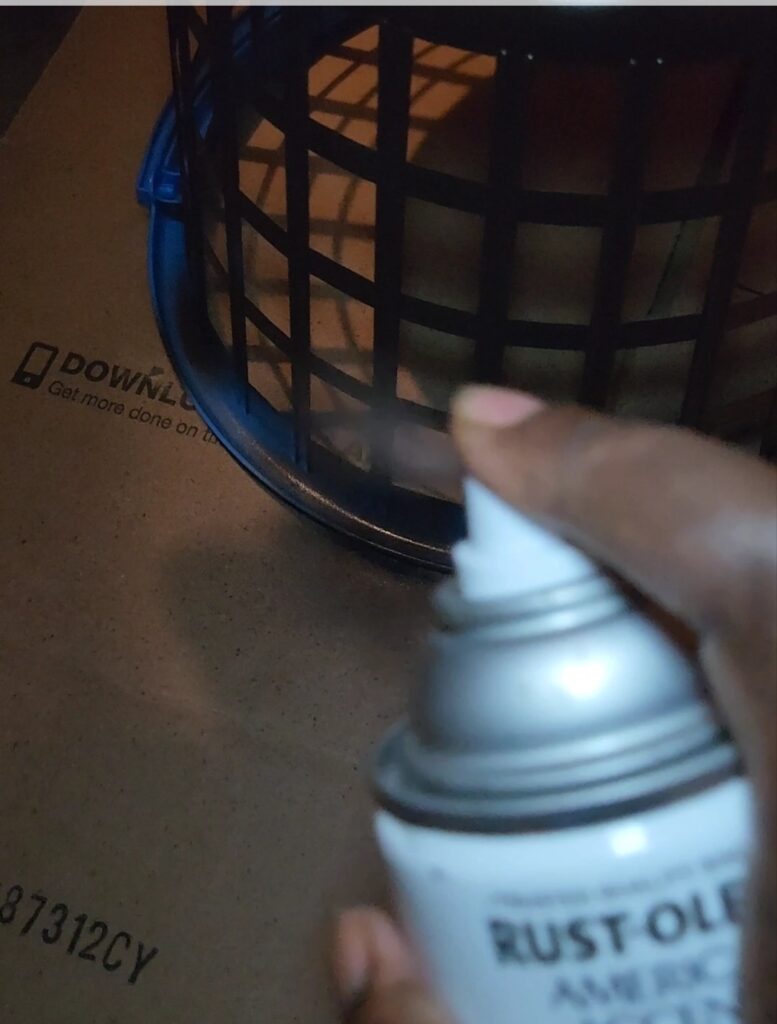
Spray paint the basket to your choice of color.
Spray paint can be used on plastic, so it is safe and easy to use. If you’re using a spray can (as opposed to a spray paint that comes in a tube), be sure to hold the basket far enough away from yourself and the surface you are painting so that you don’t get covered in overspray. I used the spray paint brand Rust-Oleum Spray paint in dark walnut.
Let it dry completely before filling it with goodies!
Line the basket with a pretty ribbon.
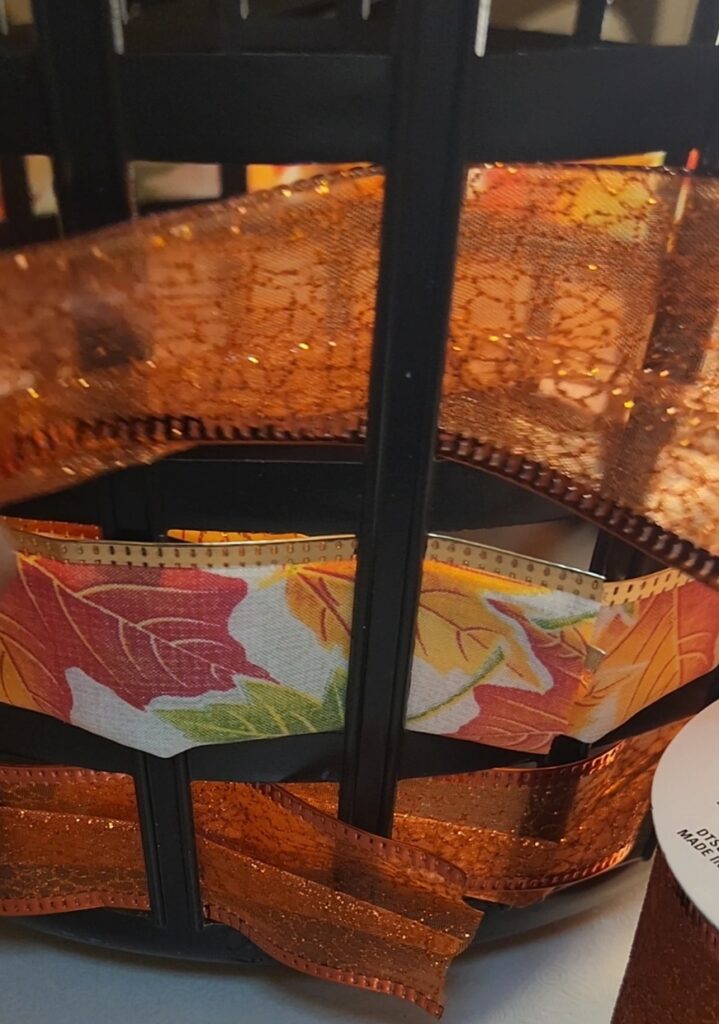
You can also use ribbon to decorate the basket. The ribbon will add color and make the basket look pretty, so it’s a good idea to use it. For example, I went with a fall theme because it would be different than the traditional pink for a baby shower.
Add a few baby items to the basket.
Add a few baby items to the basket. This is especially important for a girl’s baby shower gift basket, as clothes and accessories are the most popular gifts for girls. You can get clothes that match the theme of your basket or choose more neutral colors if you plan to use this basket later on when she has grown into toddlerhood. Baby washcloths, mittens, and socks are also great additions to any basket!
A new blanket or stuffed animal will make your gift even more memorable because it can be used repeatedly by her or given away as a keepsake once she no longer needs it. And don’t forget about some pacifiers or teething toys that can help calm her down during those fussy moments (and trust us—there will be many).
Conclusion
This baby shower gift basket will make a great gift for any mom-to-be. It’s easy to put together and it can be customized to fit your needs. There are so many options available at stores these days that you can find anything you need in one place!
]]>The 9 Best Small Kitchen Storage Ideas for Your Home
There’s a reason why they say the kitchen is the heart of the home. It’s true — you can cook, clean, and entertain all in one place! As someone who loves all those things, I can tell you from experience...
The 9 Best Small Kitchen Storage Ideas for Your Home
Shakita
The 9 Best Small Kitchen Storage Ideas for Your Home
There’s a reason why they say the kitchen is the heart of the home. It’s true — you can cook, clean, and entertain all in one place! As someone who loves all those things, I can tell you from experience that small kitchens are GREAT but present unique storage challenges. Not only is the space limited, but it’s also hard to keep everything organized. I’d like to share my favorite hacks and organization tips for small kitchen storage ideas, without having to rely on a bunch of built-in cabinetry! In this article, you are going to learn 9 Small Kitchen Storage Ideas for Your Home that will help save space and look good at the same time.
- 1. Stick with streamlined furniture and sleek containers
- 2. Add hooks for hanging
- 3. Hidden drawer storage is key in a small kitchen
- 4. Make the most of your sink area
- 5. Utilize your window space
- 6. Use magnetic strips for your knives
- 7. Use your cabinet doors for additional storage space
- 8. Add shelves to the side of your refrigerator
- 9. Use floating shelves
- Conclusion
1. Stick with streamlined furniture and sleek containers
In a small kitchen, it’s best to err on the side of sleek and streamlined. When your space is tight, items like stools are great for when you’re coming up with small kitchen storage ideas. But it can eat up valuable real estate while adding visual clutter. Opt for swivel chairs or tall stools that you can tuck away under an island or table when not in use.
Similarly, avoid adding pieces that aren’t serving a double purpose to your small kitchen area. Look for furniture with drawers and shelves so you can keep your plates and spices organized within easy reach but out of sight. Avoid floor-to-ceiling cabinets unless absolutely necessary—instead, take advantage of vertical storage space with wall-mounted display cases or hang pans and other kitchen items from hooks.
2. Add hooks for hanging
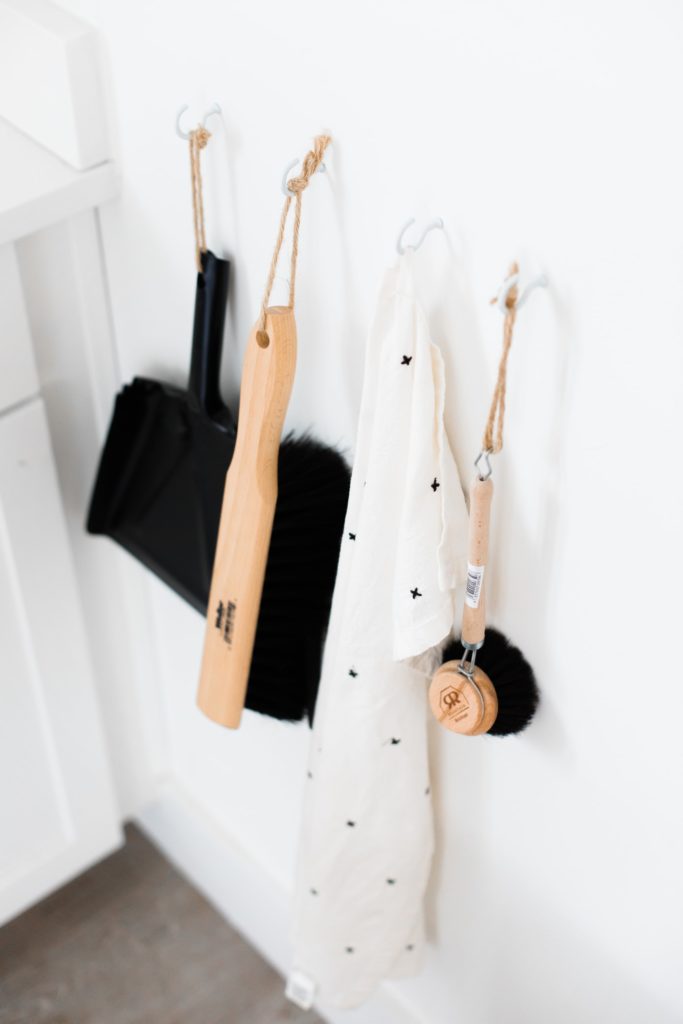
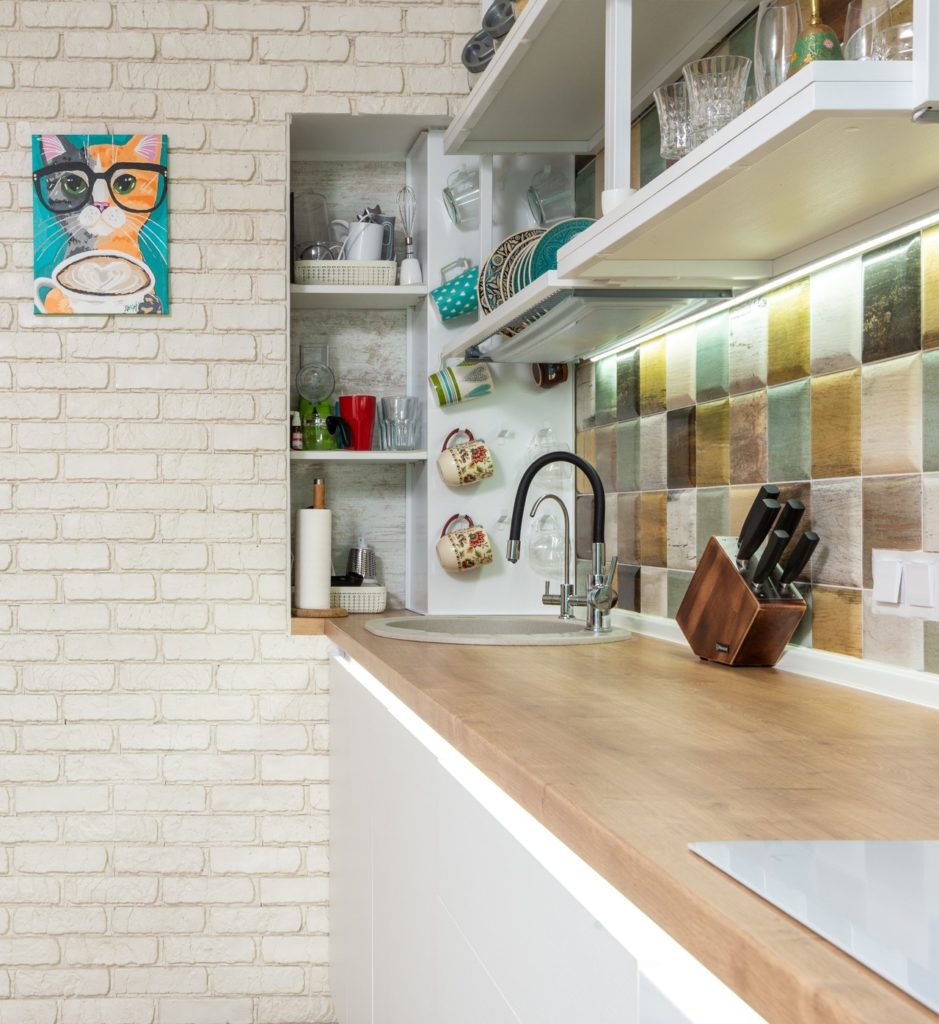
I am a huge fan of hooks as a storage solution when it comes to thinking of small kitchen storage ideas. They add so much utility to any space. They can be used to hang just about anything, and some can even double as decor — all you have to do is get creative! If you want to create more wall space, try using the back of the door or side of a cabinet to hang your pots, pans, or utensils. Or opt for placing hooks on the ceiling and hanging your plants from there.
Seriously though: Don’t limit yourself when it comes to finding a place for hooks in your kitchen. For example, if you have an open shelf area with no doors on it, why not turn that into a mini pantry by adding hooks? And sometimes, if you’re working with a small apartment kitchen with limited countertops, hanging a magnetic knife rack on the wall is an easy way to keep things out of sight but accessible.
3. Hidden drawer storage is key in a small kitchen
While drawers are often overlooked, they’re a great place to keep your favorite kitchen tools. If you’ve got enough counter space, you can pull out the drawers of your choice and quickly grab what you need.
Need more space for additional items? No problem—just add more drawers to that cabinet or place them under the sink. You can even purchase bins that fit into each compartment so you can store different things in each drawer (e.g., one bin for knives, one for spices). Whether it’s utensils or an electric mixer, drawers make finding your cooking supplies easier than ever before!
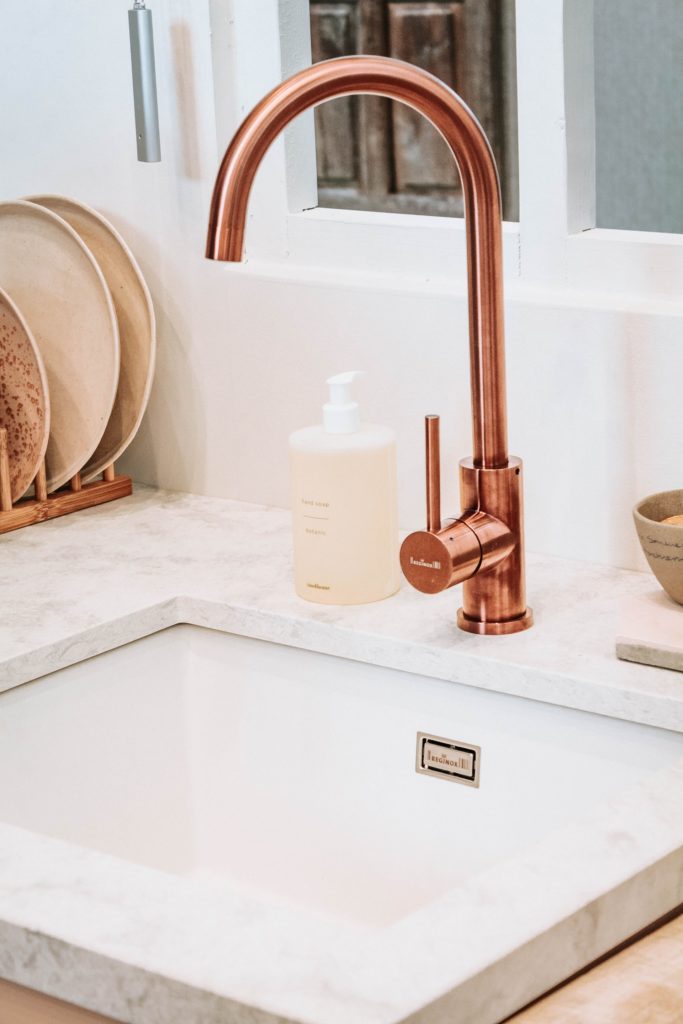
4. Make the most of your sink area
If you have a small sink in your kitchen but still have plenty of countertop real estate, use a sink tray to store soap, dishwashing liquid, sponges, and other cleaning utensils. This will prevent items from getting wet and help keep them within reach (and off the counter). In addition, add a drain rack that attaches to the side of your sink to save more space. When dishes are drying on the rack instead of out on the counter, you will be able to clear up more room for food prep and storage.
5. Utilize your window space
Unfortunately, you may not have a lot of extra wall space to hang your pots and pans from. So, use your window space instead!
Install shelves above the window for storing smaller items like spices and oil. Window boxes are also great for holding other small things like cooking utensils. And if you don’t want to block the light coming through your kitchen windows, hang a rack over them instead. You can hang utensils from these racks or even plants (which will bring life into what is probably an otherwise sterile-looking kitchen).
6. Use magnetic strips for your knives
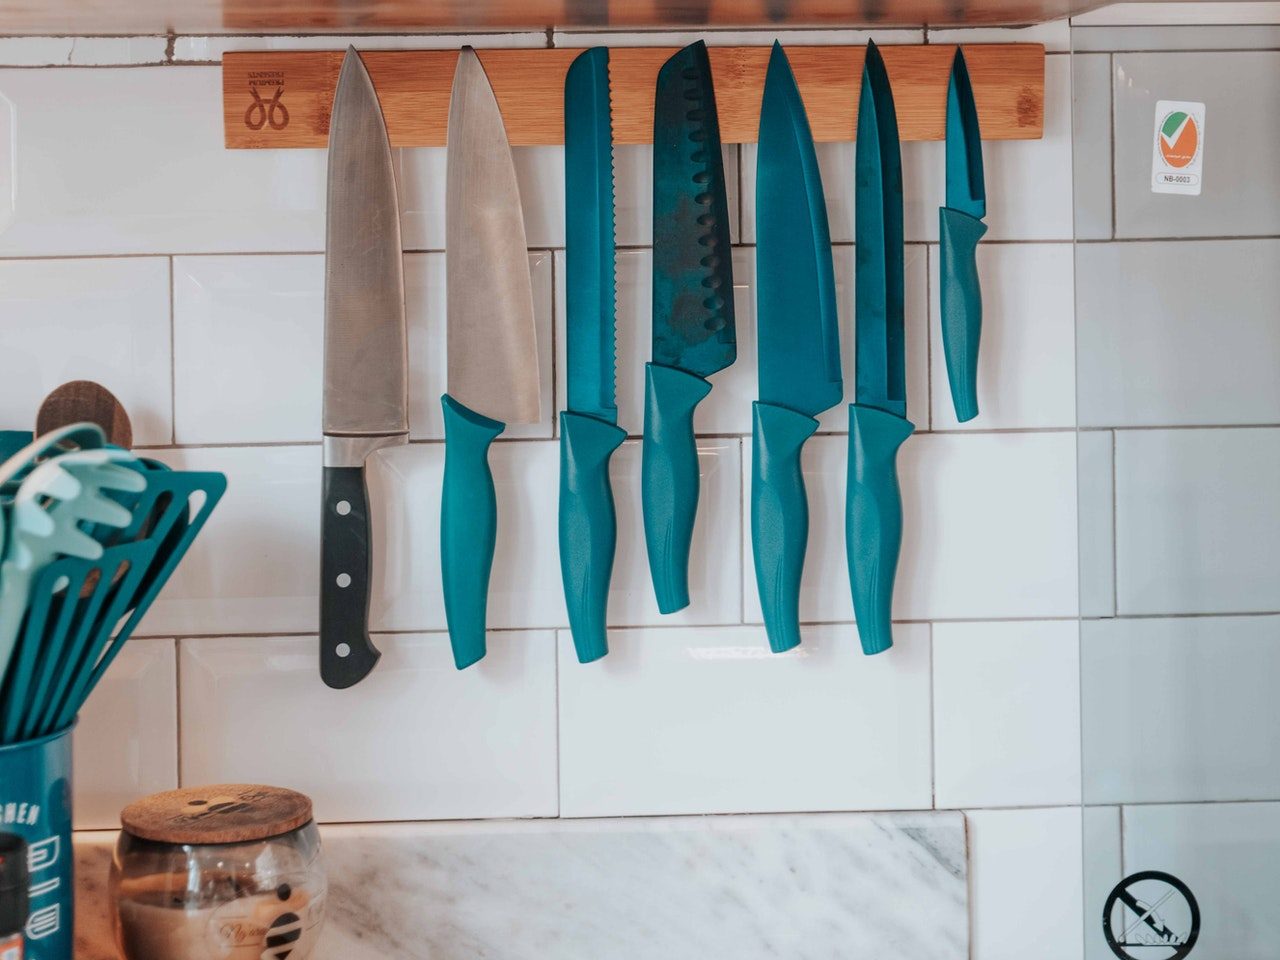
Knives are an essential kitchen resource, and keeping them organized can be tough. That’s why magnetic strips are so nice: they’re a great way to display your knives that also keeps them out of the way. You can find a magnetic strip in many kitchen stores, or easily install one yourself with everything you need at a hardware store. No matter where you buy it or how you install it, this is an easy-to-clean and aesthetically pleasing option for storing your knives.
7. Use your cabinet doors for additional storage space
A cabinet door is just a flat piece of wood with hinges on it, but look at the doors of your cabinets (and even your refrigerator) and think about how much space can actually be filled with things. It’s like an entire extra shelf!
You can use spice racks that can be mounted inside cabinet doors to hold small jars or other items. Consider investing in some of these if you have a lot of spices and small bottles that need to be stored. I personally use mine for storing my collection of different spices—there are so many flavors out there to experiment with, and they all look beautiful when they’re displayed on the back of a cabinet door.
8. Add shelves to the side of your refrigerator
When it comes to small kitchen storage ideas, take advantage of the space on the side of your refrigerator by adding shelves. This will create more storage space for food items and allow them to be easily seen and accessed. Adjustable or removable shelving is good because it gives you extra flexibility when storing larger items, but any type of shelf will do. This is an easy way to add a lot of extra storage without taking up any additional floor space in your kitchen.
9. Use floating shelves
Your options for storage are limited in a small kitchen, but that just means you’ll have to get creative. One way to make the most of your wall space is to install floating shelves. These can provide an attractive home for all sorts of items, from spices and herbs to cookbooks and glassware. The key is finding the right spot for them. If you try to cram too many shelves into a small kitchen, it’ll just look cluttered and even make the room seem smaller. Instead, stick with two or three individual shelves placed strategically on a single wall, which will be more effective than one long shelf running across your whole kitchen.
Conclusion
I hope you enjoyed reading 9 Small Kitchen Storage Ideas for Your Home. Hopefully, I’ve helped you discover some small kitchen storage ideas that will make your living space a little more organized and make cooking a little easier. Let me know your favorite small kitchen storage solution in the comments below.
The 9 Best Small Kitchen Storage Ideas for Your Home
Shakita
7 Amazing Small Laundry Room Ideas for Your Home
When it comes to your home, naturally people want to decorate each space. I’m talking about the bedrooms, bathrooms, dining areas, and office space, to name a few. You’re deciding what furniture will go where, what color to paint the...
]]>7 Amazing Small Laundry Room Ideas for Your Home
When it comes to your home, naturally people want to decorate each space. I’m talking about the bedrooms, bathrooms, dining areas, and office space, to name a few. You’re deciding what furniture will go where, what color to paint the walls, etc. When you start out thinking about small laundry room ideas, you have to think outside of the box. Otherwise, the laundry room may become an afterthought and wind up being a strange addition to your home. Well, it doesn’t have to be that way! In this article, you are going to find 7 Amazing Small Laundry Room Ideas For Your Home.
*Disclosure: This post may contain affiliate links, which means that I get a commission if you decide to make a purchase through my links, at no cost to you. Please read full disclosure here.
- The laundry room is a special place
- 7 Amazing Small Laundry Room Ideas
- 1. Create a Color Scheme
- 2. Laundry-inspired wall art
- 3. Colorful and organized baskets
- 4. Laundry room storage and shelving
- 5. Stackable washer and dryer
- 6. Install a Countertop Over the Washing Machine and Dryer
- 7. Hang a pegboard
- Conclusion
The laundry room is a special place
If you think about it, the laundry room is probably where you spend a lot of your time. Whether that’s folding clothes and putting them away or washing new purchases, you’re definitely in the laundry room often. That’s why it should be a place that inspires creativity!
As we’ve talked about before, there are so many ways to get creative with every space in your home. So here are some great ideas for making your laundry room as fun and inspirational as can be!
7 Amazing Small Laundry Room Ideas
1. Create a Color Scheme
Let’s face it: laundry rooms are not the most exciting space in the house. The last thing you probably want to do is think about are small laundry room ideas for this space. But if you want to make yours feel a little more lively and inviting, you can use color as your guide. You don’t have to be an interior design expert to create a cohesive look for your small laundry room—all it takes is some creativity and some planning!
When creating a color scheme for the room, think about how those colors will make you or your family feel when you walk in. Will your laundry room make you feel welcome? Does it create an organized and relaxing vibe? Is it bright enough to make you all feel awake while doing laundry? Whatever feeling you want your small laundry room to evoke, choose colors that complement each other well—and add them into every aspect of your small laundry room renovation so that they come together seamlessly.
2. Laundry-inspired wall art
Turn your laundry room into a work of art. Yes, you heard me right. A laundry room can be an outlet to show off your creative side. Use vinyl wall decals to give a silly quote or even paint on the wall (I really do love stenciling). Or go all out and create a beautiful mural on the wall with some poster paint and make your own DIY Wall Art for this room.
The point is, don’t make the laundry room just another boring room in the house—make it fun!
A few ideas are:
- Add a backsplash or paint a mural to create an accent wall that stands out.
- Hang up paintings (even if you stole them from other parts of your home)
- Frame mirrors and hang them up on the walls too
3. Colorful and organized baskets
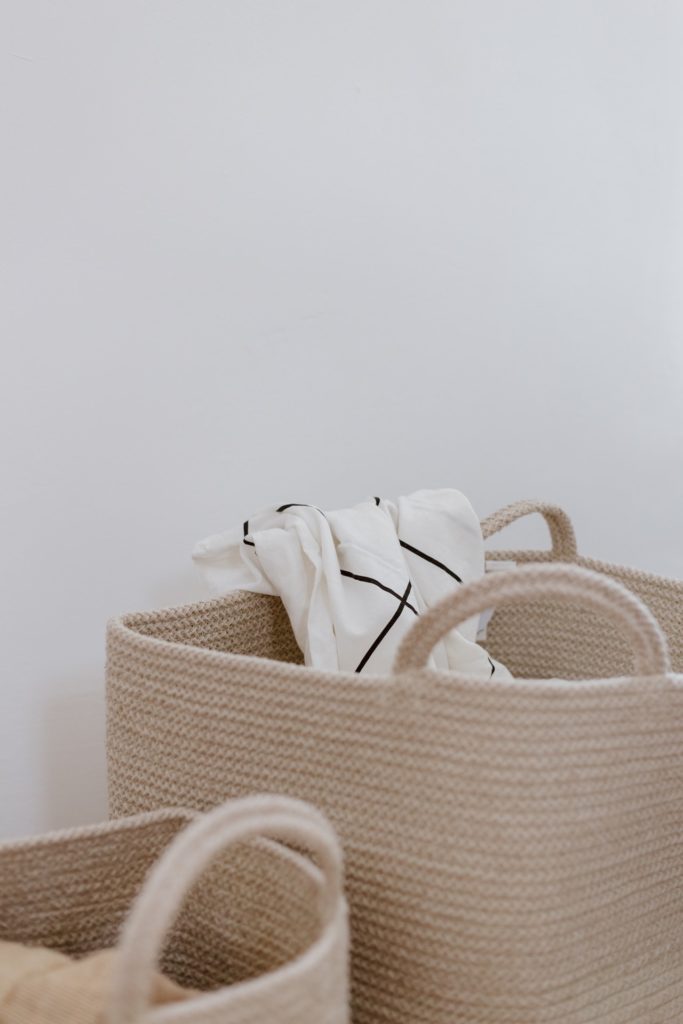
Make sure to add baskets to your list of small laundry room ideas. Why? Because baskets are a great way to add some color and organization to your laundry room. You can use them to store detergent, fabric softener, wool dryer balls, and other laundry supplies. Baskets are also great for hiding ugly hampers or for sorting your clothes before you wash them.
If your baskets are big enough, you can place items inside of them (instead of on top) so that they’re hidden from sight. You might even want to label them if you’re going to be sharing the room with other people in your household.
You can also use small baskets when transporting smaller loads of clothes from the laundry room to an outdoor clothing line (or vice versa). They make this task much easier than trying to carry big piles of wet clothes around in your hands!
4. Laundry room storage and shelving
If your laundry room is a disorganized, cluttered mess that sends you running back to the dry cleaner (even though you know their prices are ridiculous), it’s time for you to get serious about storage.
Sure, having a washer and dryer in a separate room is convenient, but what good will that do if the space itself lacks functionality? If you can’t find the detergent when you need it or are constantly tripping over stray socks, what’s the point of being able to wash clothes at home?
A few well-chosen storage solutions can help make your laundry room as functional as possible. For example:
- Use wall-mounted cabinets to store small items like detergent and fabric softener so they’re out of the way yet easy to grab.
- Consider adding a shelf above the machines where you can keep items that are frequently used, such as bleach and dryer sheets.
- Install hooks on walls near where people enter/exit this room so they can easily hang up their coats while waiting for loads of laundry
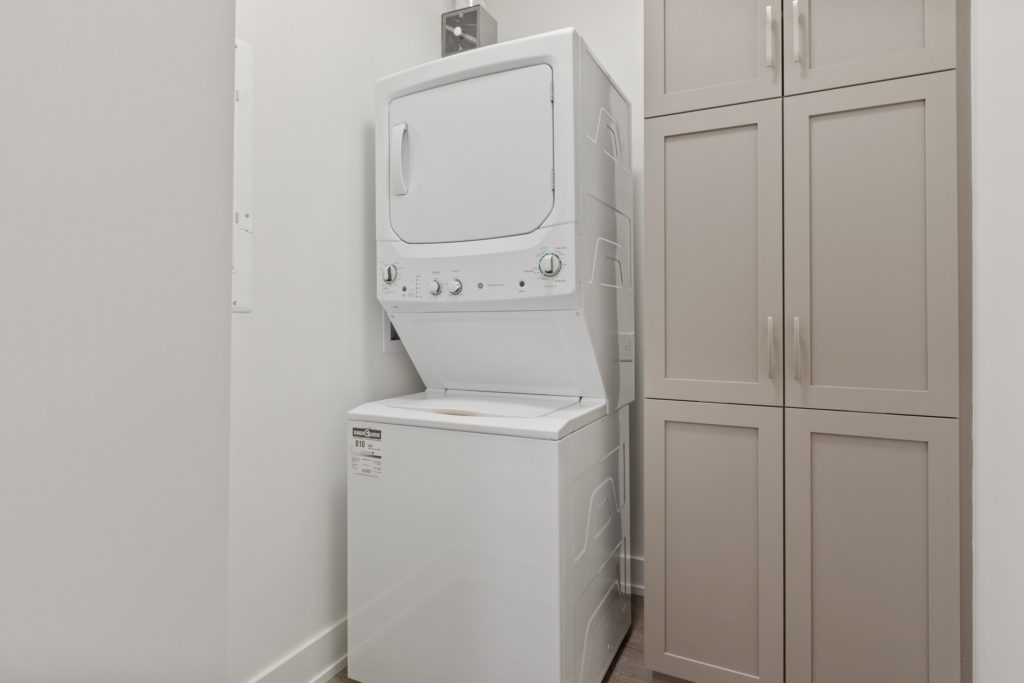
5. Stackable washer and dryer
When it comes to small laundry rooms, stackable washers and dryers are the ultimate space savers. These products allow you to do more with less, meaning that you can fit a whole lot more into your little laundry room than you would think is possible. In addition to saving space, these machines also save money by reducing utility bills as they use less water and energy while performing the same tasks as traditional machines.
6. Install a Countertop Over the Washing Machine and Dryer
This is one of the most under-utilized small laundry room ideas. A countertop over the washing machine and dryer can be used for folding clothes, sorting clothes, or as a place to sit. It can also be used as a place to put a basket of clothes that need to be washed or dryer sheets that you need for your next load.
The best thing about this idea is that it’s relatively easy to install. You just need some plywood cut into the right size and screwed down into place!
7. Hang a pegboard
Using a pegboard to organize and store small items is an easy way to keep your laundry room tidy. A large basket can be hung on the wall and used for dirty laundry, while a smaller basket can be used for clean laundry. You can even mount the pegboard directly over the washing machine or dryer so you don’t have to carry things too far after they’ve been washed or dried.
Conclusion
I hope you enjoyed reading 7 Amazing Small Laundry Room Ideas For Your Home. The idea here is to inspire you with small laundry room ideas and make them look stylish and practical. Just because you have a small space doesn’t mean you can’t make your laundry room appear to be large and functional. With an efficient layout and the right storage solutions, you’ll be able to wash, dry, and fold your laundry in no time.
We want to hear from you! Which one of these 7 amazing small laundry room ideas is your favorite, and why? Do you have any other creative laundry room ideas we didn’t mention?
*Disclosure: This post may contain affiliate links, which means that I get a commission if you decide to make a purchase through my links, at no cost to you. Please read full disclosure here.
*Disclosure: This post may contain affiliate links, which means that I get a commission if you decide to make a purchase through my links, at no cost to you. Please read full disclosure here.
*Disclosure: This post may contain affiliate links, which means that I get a commission if you decide to make a purchase through my links, at no cost to you. Please read full disclosure here.
*Disclosure: This post may contain affiliate links, which means that I get a commission if you decide to make a purchase through my links, at no cost to you. Please read full disclosure here.
]]>12 Genius Moving Hacks That Will Make Packing Easier
Moving is never fun. Trying to fit your entire life into boxes and transport it to a new place can be quite overwhelming. That’s why moving hacks are so important. Whether you’re moving across the country or just moving a...
12 Genius Moving Hacks That Will Make Packing Easier
Shakita
12 Genius Moving Hacks That Will Make Packing Easier
Moving is never fun. Trying to fit your entire life into boxes and transport it to a new place can be quite overwhelming. That’s why moving hacks are so important. Whether you’re moving across the country or just moving a few blocks away, there will be packing involved. That’s a given. The only thing you can decide is if you’re going to make it easier or difficult for yourself. In this article, I’ve gathered up 12 moving hacks that’ll help you move with ease.
*Disclosure: This post may contain affiliate links, which means that I get a commission if you decide to make a purchase through my links, at no cost to you. Please read full disclosure here.
- 1. Declutter before you pack
- 2. Start packing early, especially if you're moving far away
- 3. Clean as you pack
- 4. Use boxes from grocery stores
- 5. Label all your boxes
- 6. Use suitcases for clothing and bedding
- 7. Make a laundry basket dresser
- 8. Pack hanging clothes on hangers in garbage bags
- 9. Use paper instead of bubble wrap
- 10. Put plastic around liquids to avoid spills during transport
- 11. Take pictures of electronics before you unplug them
- 12. Use the original box things came in
- Conclusion
1. Declutter before you pack
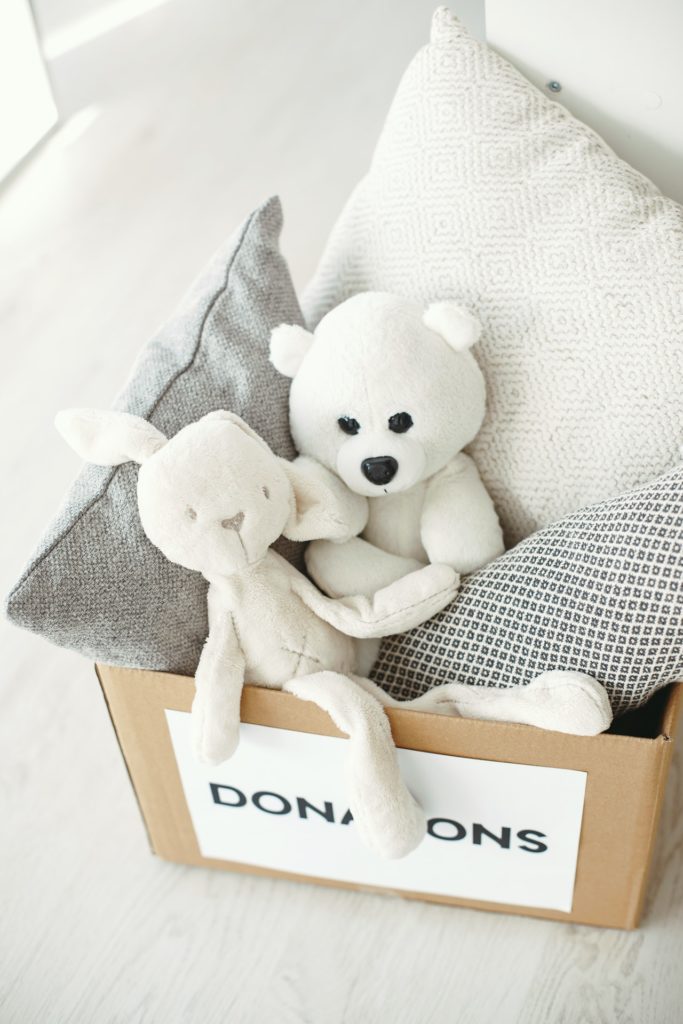
Moving is the perfect opportunity to get rid of stuff you don’t need. You’re already packing up everything in your life, why not take advantage of this moment to get rid of that stuff you’ve been meaning to toss for years? It will make moving easier because you’ll have fewer things to pack and unpack. And it’s a great excuse for a fresh start! Now’s the time.
Before you pack anything, sort through all your things. Make piles like ‘keep’, ‘maybe keep’, and ‘donate’. Put everything in your ‘donate’ pile into boxes, and when they’re full call the charity (Local thrift stores, Salvation Army, etc.) of your choice and ask them if they do pick-ups. They usually do!
If there are items in good condition that you think people would want then post them on Facebook marketplace, eBay, or where ever. But if listing them would be too much work for you right now, consider taking pictures anyway so that when things calm down after the move, it’s an easy decision whether or not to list them.
2. Start packing early, especially if you’re moving far away
One of the best moving hacks advice I can give you is if you’re able to start early, do so. I think it can be easy to get overwhelmed when you look around your home and see all of the stuff that needs to be packed up for your move. However, if you just start by packing a few boxes every day, soon enough your house will be ready for moving day!
I would also recommend starting with the things you use least first; this could mean those books on the top shelf that have been unopened since your last move, or the pots and pans in the back of your cabinet that have never seen action. The less stuff you need to pack closer to moving day, the better!
If you’re really ambitious and want to pack as far ahead of time as possible—although I wouldn’t recommend this unless it’s a local move—you can even start months ahead of time by packing away seasonal items (i.e.: winter coats in summer or swimsuits in winter). If there’s any overlap between seasons in terms of clothing items, like sweatshirts versus jackets or flip flops versus sandals, then make sure you keep those out so you don’t forget about them or lose them during packing.
3. Clean as you pack
Packing up your home can be hugely overwhelming by itself, let alone taking on any extra tasks. But what if we told you that you could knock out a spring cleaning at the same time? How about a deep clean of each room as you pack it up? It’s not just possible, it’s the perfect solution for organizing and cleaning done in one go.
Imagine how much calmer and more put together you’ll feel once you move into your new place with all those clean clothes, dishes, and linens waiting for you in their new homes. You won’t have any outstanding cleaning to do when unpacking in your new house—you’ll already know that every single item has been cleaned before it was even packed away!
4. Use boxes from grocery stores
You can find sturdy, free-of-charge boxes at your local grocery store. Just make sure the boxes are:
- Not damaged
- Large enough to hold the items you’re trying to pack
- Free of labels (you don’t want to be carrying a box that says “frozen peas” around all over)
If you don’t have enough boxes on hand, you can use laundry baskets or suitcases as moving hacks when packing up nonbreakable belongings like clothing and linens. Simply load the suitcase with your stuff—and voila! You’ve got an item ready to be transported.
5. Label all your boxes
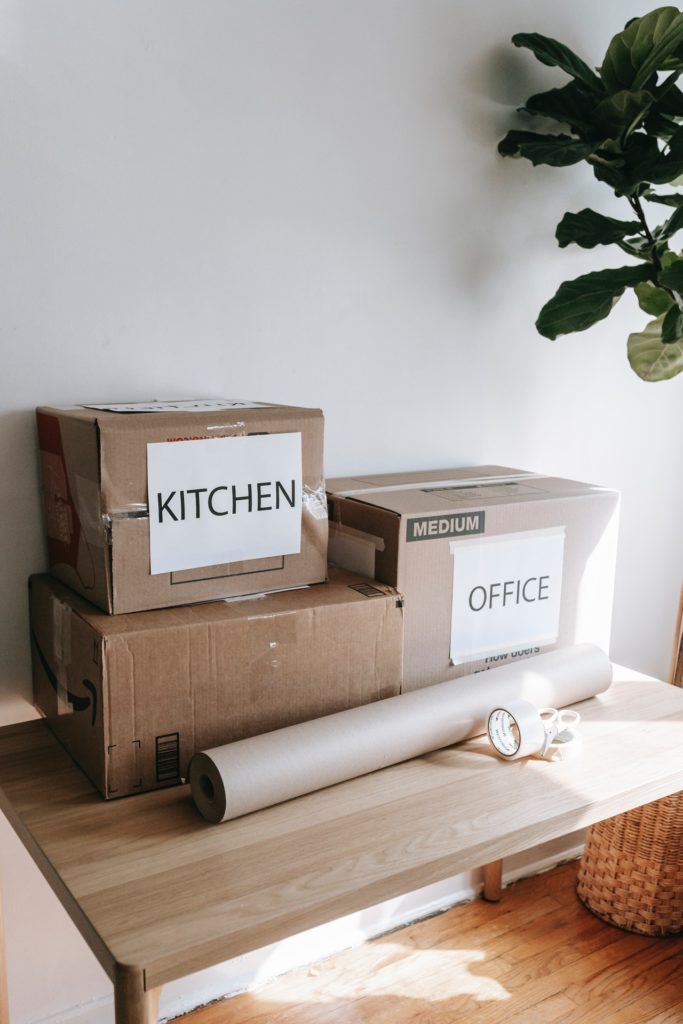
Label all of your boxes with the room they belong in, as well as their contents. If you have anything fragile, write FRAGILE on the box. If you have something heavy, write HEAVY on the box. And if you have something that you absolutely need to unpack immediately upon arriving at your new place, then mark the box OPEN FIRST.
Additionally, consider using different colored permanent markers for certain boxes. For example:
- RED marker: rooms like kitchens and bathrooms (where breakage might occur)
- GREEN marker: electronics
- BLUE marker: clothing
6. Use suitcases for clothing and bedding
As mentioned earlier, suitcases are one of many great moving hacks because suitcases help to keep your clothes wrinkle-free and organized during a move. They can also be used for blankets, sheets, and pillows! Suitcases are easy to transport in your car, so they have a lot of advantages over boxes.
7. Make a laundry basket dresser
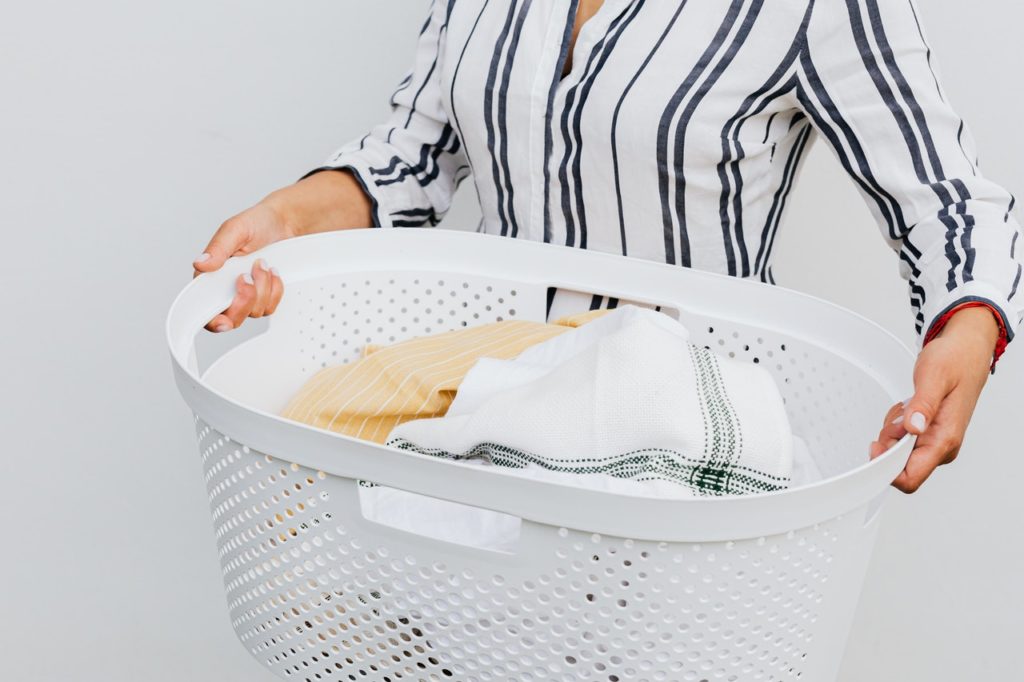
Take advantage of laundry baskets and plastic bins by using them to store items you otherwise would have folded up into a cardboard box.
For example, you can fit all your socks and underwear into one or two baskets. Use another basket to stuff with towels. And fill up a plastic bin with sheets instead of folding them up.
Pack the items of dresser drawers into those same containers–they’re made for people’s clothes anyway!
8. Pack hanging clothes on hangers in garbage bags
Let’s face it: you’re probably not going to have a ton of extra time when moving. So here’s a way to save some. This hack lets you hang your clothes on hangers, then transfer them in one fell swoop to the closet at your new place, saving you from having to unpack and hang up each shirt/dress/pair of pants.
First, gather all the hangers that are used to hang your clothes. Once they’re all gathered, put them in large garbage bags and tie them shut around the top of the hangers. Then, label the bags based on what room they’ll go in once you get to your new place. Voilà: no more wrinkled clothes!
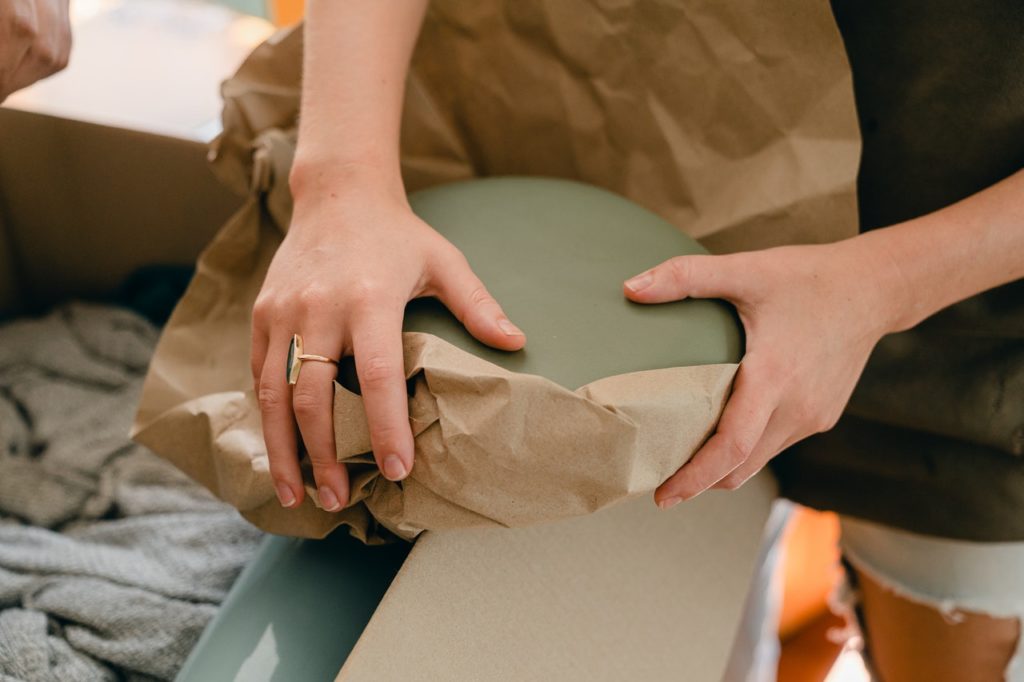
9. Use paper instead of bubble wrap
It’s true: you can use newspaper or brown packing paper in place of bubble wrap. This is part of the list for great moving hacks because It’s more readily available, more cost-effective, and better for the environment. As an added bonus, it’s also easier to pack with—you can easily mold paper to fill in odd-shaped spaces and add another layer to protect your items.
10. Put plastic around liquids to avoid spills during transport
If you don’t have a lot of plastic bags on hand, you can use plastic wrap, which is great for items that can’t be placed in a bag, such as bottles. Just place the plastic wrap over the top and press it down around the edges so it sticks to itself and covers the opening. You might want to do two layers just to be safe. Then simply put the lid back on and your liquids are ready to go.”
11. Take pictures of electronics before you unplug them
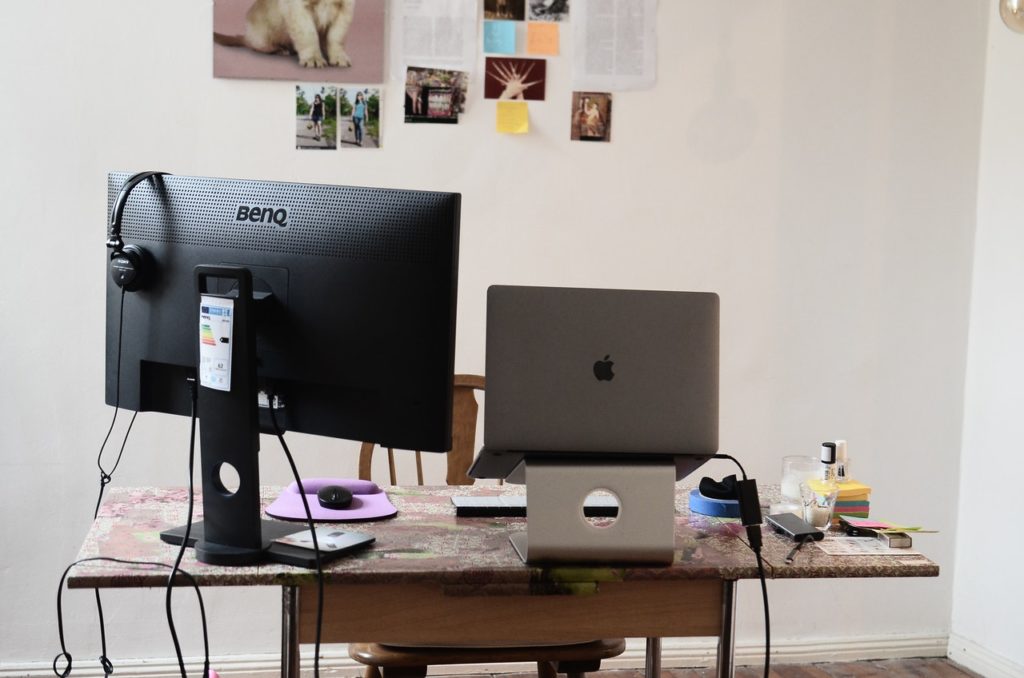
You know when you unplug your TV and sound system in preparation for the move? Yeah, that’s normally easy enough, but it can be a pain to remember how everything was connected—and make sure you’re not leaving any cables or accessories behind.
Enter the power of taking pictures of everything before you disconnect. If you’re selling your stuff, these photos will come in handy for the buyer, too. Now all you’ll have to worry about is getting rid of that old VHS player on eBay.
12. Use the original box things came in
Reusing boxes that things originally came in also falls under best moving hacks you can use when packing up your belongings. The boxes are built to accommodate the items you have and are oftentimes better quality than any other box you could find since they’re designed to be shipped around.
They’re also free, which is always nice. Plus, reusing such boxes is good for the environment and will make you feel like a responsible adult—just what you need while going through the stress of a move!
Conclusion
I hope you enjoyed reading this article, “12 Genius Moving Hacks That Will Make Packing Easier.” When it comes to moving, there’s never a convenient time to do it — but that doesn’t mean you can’t make the process more bearable. The moving hacks provided will hopefully serve as inspiration for some of your own moving hacks, and if you implement them before your next move, everyone will be happier for it.
12 Genius Moving Hacks That Will Make Packing Easier
Shakita
8 Amazing Ways To Get Motivated To Clean
Let’s be honest, sometimes it can be hard to get motivated to clean. Sure, it’s easy to get motivated when your parents or friend(s) come over out of the blue. But on a regular day when there are no impending...
]]>8 Amazing Ways To Get Motivated To Clean
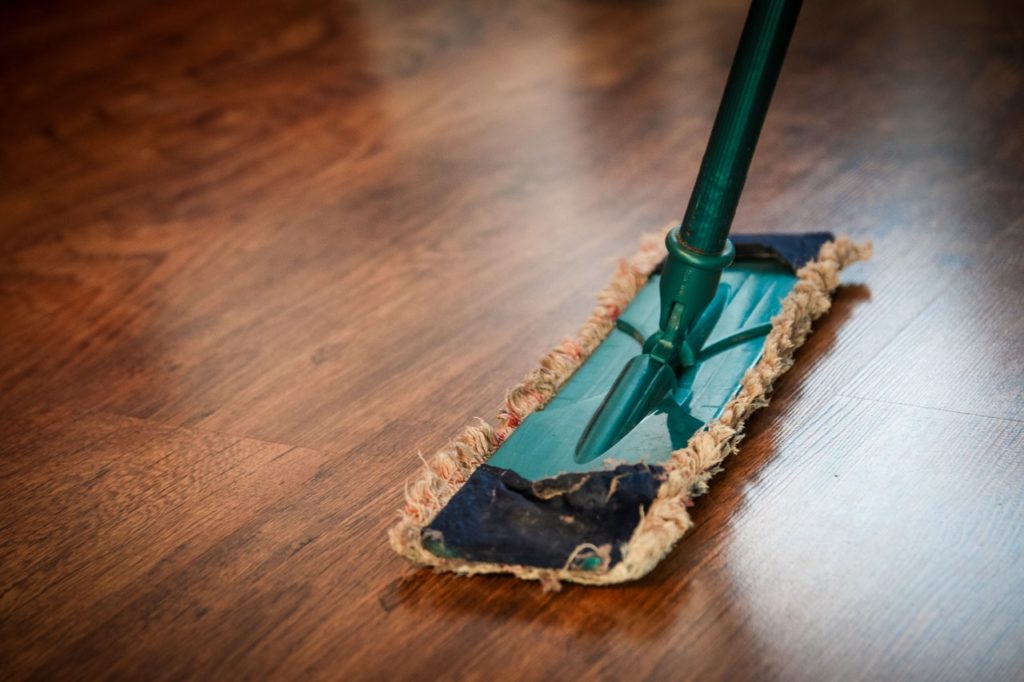
Let’s be honest, sometimes it can be hard to get motivated to clean. Sure, it’s easy to get motivated when your parents or friend(s) come over out of the blue. But on a regular day when there are no impending visits from guests, laundry piles up and dust collects in corners and there always seems to be an empty box or container somewhere because you’re too lazy to throw it away (or even put it in the trash can that’s literally meters away). We’ve all been there, I know I have. That’s why I’ve found some methods for getting motivated to clean. In this article, you are going to learn 8 Amazing Ways To Help You Get Motivated To Clean.
*Disclosure: This post may contain affiliate links, which means that I get a commission if you decide to make a purchase through my links, at no cost to you. Please read full disclosure here.
- 1. Set a timer.
- 2. Blast your favorite music while you clean
- 3. Have a cleaning party with your friends.
- 4. Create a pretty space that motivates you to clean it.
- 5. Reward yourself when you are done cleaning.
- 6. Clean in small bites
- 7. Cleaning is something you can do for self-care in hard times.
- 8. Find a way to make the process easier
- Conclusion
1. Set a timer.

One of the best ways to get motivated to clean is by setting a timer. This can be done in many different ways, but for starters try setting it for 15 minutes and just cleaning one room or area of your home. You could also set it so that you spend 30 minutes doing chores every day or even an hour if you’re feeling ambitious! If you want to go all out and really challenge yourself, set a timer for the whole day (or week) until everything is spotless!
2. Blast your favorite music while you clean
One of my favorite ways to get motivated to clean is listening to my favorite music. Music is a great motivator. It can help you get into a rhythm, it can lead to positive thoughts, and it can make cleaning less of a chore that you hate doing. It’s hard to clean when all you’re thinking about is how much you hate cleaning, but if the music is upbeat and fun then your mind will be distracted and more likely to get into the groove of cleaning.
If you listen to music while doing chores around the house (and especially if they’re boring chores), then chances are good that time will go by faster than usual—because your brain focuses more on what’s going on in front of it instead of being distracted by other thoughts or feelings such as stress or anxiety about having so many things left undone before bedtime rolls around again tomorrow night!
3. Have a cleaning party with your friends.

If you find yourself struggling to get motivated to clean the house, try inviting some friends over and clean together. Not only will this help you get things done faster and more efficiently, but it’ll be a lot more fun too. If all goes well, after you finish cleaning your place, you could even have lunch or dinner together!
You may be asking, How do I invite my friends over?
Great question! The first thing that needs to be decided is what time everyone can make it over and what day(s). Make sure your friends understand how appreciative you are of them and let them know that there will be pizza and drinks as your way of saying thank you.
4. Create a pretty space that motivates you to clean it.
When you make your house pretty, it makes you want to keep it that way. You don’t want to see your hard work go to waste. So establish a routine that helps keep things clean and tidy.
Start by adding some plants or flowers around the house. Plants are naturally beautiful and add life and color to any space—plus they help purify the air! Add some candles with nice scents too; they’ll make your home smell great while also making it look cozy and inviting when there’s light coming in through the window behind them!
5. Reward yourself when you are done cleaning.
After all the hard work you’ve done, it is time to reward yourself. You deserve it! You can reward yourself with a treat or by taking a break and relaxing. You can also pat yourself on the back and tell yourself how proud you are of yourself. Finally, do something that you enjoy such as watching TV or reading a book so that your brain can take a break from all the cleaning tasks you have completed.
6. Clean in small bites
Cleaning is a daunting task to undertake, especially when you’re in the mood to throw up your hands and say, “I give up!” But if you can get past that first hurdle—getting yourself motivated enough to start cleaning—you’ll find that it will be much easier than you thought.
Start small. Pick one small component of whatever area needs cleaning and focus on that first. For example:
- You want to clean out your garage, but all those boxes are overwhelming and make you want to avoid the whole project altogether. Instead of overwhelming yourself with the entire garage, start with just one shelf or one corner.
- Do you need motivation for doing dishes after dinner every night before bedtime? Do them as soon as everyone else has cleared out from the kitchen so there isn’t any cleanup left after finishing them off! This way there’s no time pressure because nobody has left yet plus no dishes waiting in the sink until tomorrow morning!
7. Cleaning is something you can do for self-care in hard times.
Cleaning is a great way to get your mind off the bad things going on in your life, and it’s also a helpful way to relieve stress without having to talk about it with someone else. It’s also been shown that routine is important for mental health, so making cleaning part of your daily schedule will help keep you organized and feeling good about yourself—even when things are tough. Plus, some studies have suggested that decluttering may help improve people’s moods by giving them more control over their surroundings. You’ll feel better both physically and mentally once you’ve rid yourself of old things you don’t want or need anymore.
8. Find a way to make the process easier
The easiest way to get motivated to clean is to make it easier. If you’re having trouble getting started on a project, don’t start at the beginning. Do what you can with the tools that are already at hand. For example:
- Hire a cleaning service (if you can afford it).
- Use a robot vacuum cleaner.
- Keep your house tidy so that things are always in their proper place, making it easier for you to put things away as soon as they come out of the dryer or off of the drying rack (or wherever else they may land).
Conclusion
I hope you enjoyed reading 8 Amazing Ways To Help You Get Motivated To Clean. Hopefully, you’ve found this article helpful in getting motivated to do a little cleaning around the home. Whether it’s a simple floor sweep or a major overhaul of your living space, I think most of us could use a little motivation. Just remember—it doesn’t have to be perfect, and it doesn’t have to happen all at once. If one day you only get five minutes in the kitchen, that’s something. Just keep trying until you make a dent in your list and feel energized by your progress.
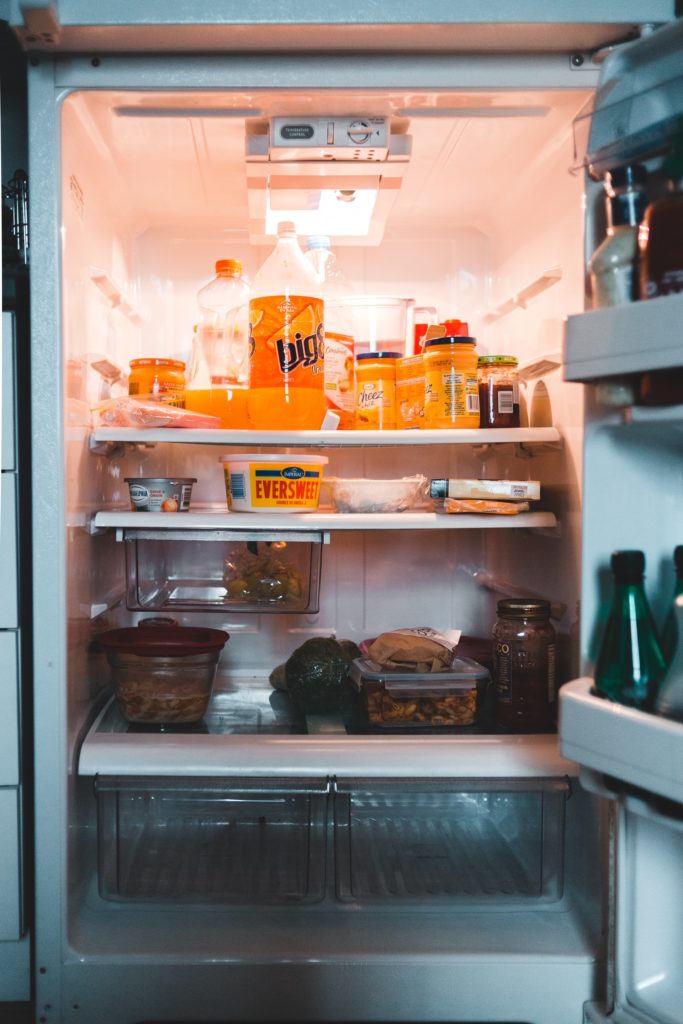
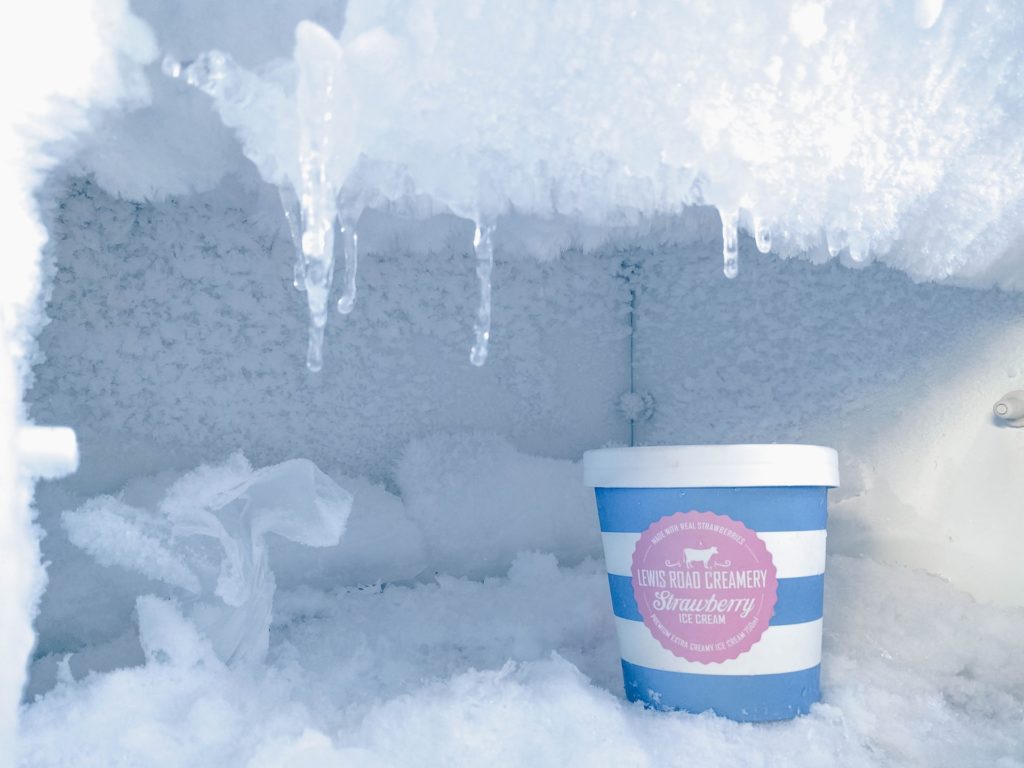
]]>Refrigerator Organization Hacks: 6 Easy Ways to Store Your Food
Refrigerator organization can be a big task. Without proper planning and organization, you can find yourself searching endlessly through your refrigerator trying to find what you’re looking for. This is particularly challenging when you have an overstuffed refrigerator like I...
Refrigerator Organization Hacks: 6 Easy Ways to Store Your Food
Shakita
Refrigerator Organization Hacks: 6 Easy Ways to Store Your Food
Refrigerator organization can be a big task. Without proper planning and organization, you can find yourself searching endlessly through your refrigerator trying to find what you’re looking for. This is particularly challenging when you have an overstuffed refrigerator like I often do. In this article, you are going to learn about Refrigerator Organization Hacks: 6 Easy Ways to Store Your Food.
*Disclosure: This post may contain affiliate links, which means that I get a commission if you decide to make a purchase through my links, at no cost to you. Please read full disclosure here.
- 1. Let's start with good cleaning
- 2. Label and date your food
- 3. Use a Lazy Susan
- 4. Use baskets to separate food
- 5. Freeze foods you won't use right away
- 6. Stackable fridge drawers
- 7. Use the inside of your refrigerator door
- 8. Put your fresh herbs in glass jars of water so they stay fresh longer
- Conclusion
1. Let’s start with good cleaning
First on the list for refrigerator organization hacks is cleaning. The inside of your refrigerator is likely the last place you want to spend time. It’s where forgotten leftovers deteriorate and mysterious splotches of mold go unnoticed. Even if you’re organized, who has time to be thorough? But keeping a clean fridge isn’t just about aesthetics—it’s also good for your health! Molds and bacteria can grow in warm, moist environments like the inside of a fridge, which can make you sick. To avoid this problem, try cleaning at least once a week by getting rid of any old food that has expired.
The best way to get started is by giving your fridge an initial deep clean, then cleaning it regularly after that. When deciding how often you should clean, remember that if something hasn’t gone bad yet (but will soon), just remove it from the fridge instead of wasting your energy on scrubbing!
- Take everything out of the refrigerator and freezer
- Use warm soapy water with baking soda sprinkled in to scrub down the walls and shelves as well as any sponges or cloths used during cooking (this will serve as pre-cleanse)
- Wipe down all surfaces with a wet rag (again, try using baking soda sprinkled on the rag)
- Use a dry rag to wipe off excess water (or use one side of your sponge or cloth)
- Replace all food back into the refrigerator while still damp
2. Label and date your food
If you must remember one rule when organizing your fridge, remember this: label and date all of your food.
I can’t emphasize the importance of this when it comes to refrigerator organization hacks. If you don’t know what something is or how long it’s been in there, do you really want to eat it? It doesn’t matter if you use masking tape and write with a Sharpie marker, or if you use a more expensive label maker. And no matter how much space you’ve freed up by organizing your fridge, you don’t want to waste any of it by throwing out food that’s gone bad because it wasn’t labeled.
3. Use a Lazy Susan
If you’re like most people, then your refrigerator is probably crowded with food and drinks that need to be kept fresh or chilled. A great way to keep things from getting jumbled in the back of your fridge is by using a Lazy Susan for storing certain types of foods.
This is one of my favorite refrigerator organization hacks because the rotating tray is so easy to place anywhere in the fridge, and it will allow you to have everything within arms’ reach. It has compartments where you can organize your vegetables, fruits, cheese, and other items. And if you don’t have a lot of space in your refrigerator, this solution will free up some space by allowing you to store perishable items that are normally stacked on top of each other.
When choosing a Lazy Susan for your storage purposes, make sure it’s made out of sturdy material. The last thing you want is one that has flimsy sides that can collapse on top of already-stacked food items!
4. Use baskets to separate food
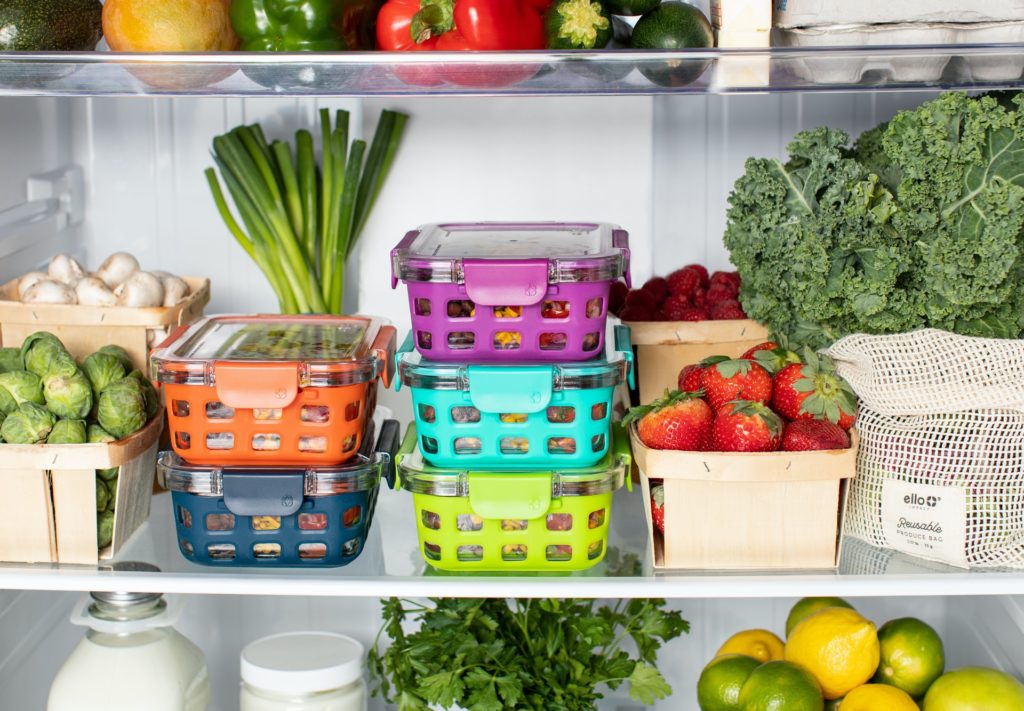
Baskets are an absolute must! This is one of my favorite refrigerator organization hacks! Why? Because baskets allow you to take some control over the chaos that is in your refrigerator, making it easy to find what you’re looking for and helping you maximize the space inside by keeping things separated. Plus they add a nice aesthetic touch! To make sure you’re using your fridge in the most efficient manner possible, here are a few ideas for how to use different kinds of baskets in ways that will make your life easier.
- Use one for fruits, vegetables, and other produce
- Use one for condiments (ketchup, mustard, mayo) and sauces that should be kept separate from fruits
- Use one for meats like chicken breasts or pork chops
- Use one for dairy (cheese, butter, yogurt).
5. Freeze foods you won’t use right away
Freezing food is one of my favorite refrigerator organization hacks because it’s a great way to save money, eat healthy meals all week, and even reduce waste. The freezer is a wonderland of opportunity, but it can be daunting to know how to store so many different types of ingredients and leftovers. How long can you freeze vegetables? Are there foods that should never be frozen? Can I freeze meatballs in sauce for a quick dinner one night?
From freezable fruits to delicious dinner entrées, here are a few ideas for storing your food properly so that it tastes as good after freezing as it did before.
- Dairy products: 6 to 12 months. Milk and butter freeze well; try freezing grated cheese in ice-cube trays for later use. (Pop out a few when you need them!)
- Eggs: 12 months out of the shell. According to the USDA, for the best quality it is best to store frozen eggs blended eggs, whites or yolks.
- Meats: 4 to 12 months (ground meats last longer than steaks or roasts). Pack tightly, then wrap thoroughly in plastic wrap before putting it into a zip-loc bag. Label and date, then freeze immediately—thawing it first slows the deterioration of frozen meat as well as cooking time once thawed and refrozen.
- Fruits: 8 to 12 months. Remove any rotten parts or bruised portions before freezing; blanch peaches and pears if they’re not going to be used within two weeks after being thawed; consider dipping strawberries into an antioxidant-rich mix containing vitamin C powder before freezing; store berries in the freezer individually so they don’t freeze together into one giant clump.
- Vegetables: 8 to 12 months (the exception is green beans which are better off dumped with other frozen veggies since they lose their crunch faster than most veggies). Blanch baby peas and corn before packing if you want that fresh flavor and texture when defrosted; beets should be cooked first and then stored for up to 3 months; pumpkins can keep for up to 1 year.
6. Stackable fridge drawers
You know how some people arrange their kitchen cabinets so that it’s easy to see exactly what’s inside? If your cabinets are like my mom’s and look like a tornado went through them, then I’m about to tell you about the perfect solution for storing your fruit and veggies.
What I’m talking about is stacking fridge drawers. You can use this with any type of fridge. This is because there is a sliding mechanism (it has rubber on one side) that lets you add and remove the drawers from each other like an ice cube tray.
Fruit and vegetables store well in these drawers because they’re clear, so there’s no mystery as to where everything is, and it also helps keep them fresh for longer! You can wash these drawers in the dishwasher, so you don’t have to worry about germs getting into your food before you eat it! For items that are too big for these drawers, just use regular plastic containers instead!
7. Use the inside of your refrigerator door
I’m going to let you in on a little secret about refrigerator storage, and you might not like it: The inside of the refrigerator door is hands-down the warmest part of your fridge. Yes, I know. You open that door all the time, letting out all the cold air and exposing your food to those rising temperatures.
The truth is the refrigerator door is the worst place to store meat or dairy products. You may be thinking what does this have to do with refrigerator organization hacks?! It’s actually a great place for condiments like ketchup and mustard because they won’t go bad sitting at room temperature anyway. Other foods with similar shelf lives will also do just fine on your fridge door (so long as you don’t leave them out too long), including most oils and bottles of vinegar, pickles, olives, relish…you get the idea here.
8. Put your fresh herbs in glass jars of water so they stay fresh longer
Fresh herbs are a fantastic way to add flavor to your cooking without adding salt or fat, but they can go bad quickly. Here’s an easy solution: put your cut-up fresh herbs in a mason jar glass filled with water, and then put the glass on the shelf. The water will keep them from browning, but you have to change it every few days—otherwise, it can get mildew in it.
Conclusion
I hope you enjoyed reading Refrigerator Organization Hacks: 6 Easy Ways to Store Your Food. Organizing your refrigerator doesn’t have to be a daunting task. In fact, with the right tools and products, it’s possible to keep your refrigerator well organized without breaking a sweat. If you’re looking for some easy, no-hassle ways to tackle this challenge, check out the hacks above.
Refrigerator Organization Hacks: 6 Easy Ways to Store Your Food
Shakita
5 Ideas to Create a Beautiful Cozy Minimalist Home
Minimalism is exploding in popularity and it’s easy to understand why. It is often said that less is more and minimalism teaches us that letting go of possessions can bring freedom and happiness. Minimalist homes are therefore great for living...
]]>5 Ideas to Create a Beautiful Cozy Minimalist Home
Minimalism is exploding in popularity and it’s easy to understand why. It is often said that less is more and minimalism teaches us that letting go of possessions can bring freedom and happiness. Minimalist homes are therefore great for living a more peaceful, fulfilled life. If you are interested in creating a beautiful minimalist home of your own, in this article you are going to learn 5 Ideas to Create a Beautiful Cozy Minimalist Home.
*Disclosure: This post may contain affiliate links, which means that I get a commission if you decide to make a purchase through my links, at no cost to you. Please read full disclosure here.
- What is a cozy minimalist home?
- Define your purpose for each space
- Start with a neutral color scheme
- Use symmetry to create balance
- Choose sustainable materials for home furnishings
- Buy some plants
- Add multi-functional pieces
- Use natural lighting to your advantage
- Don't be afraid of negative space
- Conclusion
What is a cozy minimalist home?
Let’s start by answering the question of what a “Cozy Minimalist Home” is. The term “minimalism” may bring to mind images of white walls, sleek furniture, and a lack of clutter, but the best cozy minimalist homes are much more inviting than that. In fact, they don’t really have anything in common aesthetically—a traditional home can look just as beautiful as a modern one when it’s decorated with a minimalist approach.
Minimalism isn’t about having less; it’s about making room for more of what matters. It’s not just about how your home looks; it’s about how you feel when you’re there. Your physical space can play a big part in your emotional well-being, so creating a place that feels cozy and inviting doesn’t just make you feel good; it makes life better for everyone!
Define your purpose for each space
The first step in creating a beautiful cozy minimalist home is to define the purpose of each space. Minimalist design is all about being intentional with what goes into your home and ensuring that each item has a specific purpose. To keep it simple, make sure that every room in your house serves one function only.
If you’re going to have an office, then don’t put a couch in there (as much as you may want to). And if you do want a couch in the office for those “no pants Friday” days, then make sure that it doesn’t take up more than 20% of the room because otherwise, your office will feel like a living room (and thus be less than ideal for working). In other words—don’t create situations where items from opposite sides of the spectrum disturb the harmony of your minimalist home.
Start with a neutral color scheme
As a minimalist, you are probably looking to create a space that is calm and simple. One of the best ways to achieve this vibe is with neutral colors. When the walls and floors are neutral, the space will feel larger, more relaxed, and more serene. Neutral colors offer a blank canvas for your decor to go in any direction.
Neutral colors include white, gray, and tan. These shades are calming and they flow with your basic furniture (i.e., sofas, chairs), which can be decorated with colorful pillows or accent pieces like throw blankets or area rugs.
You can also change things up using colorful accents. For example, if you want something more lively or bolder than minimalism normally offers, you can buy say a green sofa that gives a pop of color against white walls for example!
Use symmetry to create balance
Symmetry is your best friend. A big part of the minimalist look is being uncluttered, which means you want to keep things evenly placed and organized. Symmetrical design creates a sense of calm. When you see symmetry, it’s like a breath of fresh air: “Oh thank goodness! It’s not cluttered!”
Typical examples of symmetrical objects are vases, books, pillows, lamps, and candles. While these are all important objects for creating a perfect home decor scheme, they can look a little too “busy” if they aren’t arranged in an orderly way. The idea here is to use symmetry to create a sense of balance—the more balanced your room looks, the calmer it will feel.
Choose sustainable materials for home furnishings
The main idea of cozy minimalist home design is to create a space that feels clean, warm, and inviting. This makes using sustainable materials for furniture and fixtures a key part of getting the look right. While sustainable materials are typically more expensive than the alternatives, they can be worth the extra money if they help you create an atmosphere that brings more joy and comfort into your life.
Some examples of sustainable materials are wood, cork, and organic cotton. However, other materials may be considered sustainable depending on their sourcing or manufacturing process. As you shop for furnishings for your home, ask about the type of materials used in each product so you can make informed decisions about what will work best for your space.
When shopping for furniture with eco-friendly features, check out companies such as Floyd Home Furnishings or Mitchell Gold + Bob Williams to find pieces made from sustainably sourced wood or other natural products. If you’re looking for smaller items like rugs or pillows made from natural fibers such as linen or hemp fiber instead of synthetic fabrics like polyester fiberfill (which is derived from plastic), consider browsing Etsy’s selection today!
Buy some plants
Plants have the ability to alleviate stress, improve air quality, and can actually help you breathe easier by increasing oxygen levels in a room. They also make you feel more relaxed on a psychological level—in fact, research from American Psychological Association show that “interacting with nature” is synonymous with happiness in human brains. So why not buy some plants to improve your mental health and make your living space homier at the same time?
If you’re worried about keeping them alive, start with something easy like succulents or bamboo (not lucky bamboo though! It’s toxic to cats). If you think of yourself as a bit of a green thumb, then go ahead and grab an orchid or two—they can survive for years if you keep them watered!
Whatever plant(s) you choose, once they’re in place around your house and apartment, enjoy the greenery and watch as things begin to feel a little less bleak every day.
Add multi-functional pieces
You can create a multi-functional piece by purchasing furniture that serves more than one function. This will save space and money, as well as prevent clutter. It’s also an excellent way to help with organization. For example, you could purchase an ottoman that turns into a coffee table when you flip up the top of it. Or perhaps buy a storage bench with wheels so that it doubles as a bar cart or laundry hamper when needed—and vice versa!
Use natural lighting to your advantage

Having natural light in your home is an easy way to make the space feel more open and inviting. It doesn’t take a lot of effort to get natural light in the home, either. You don’t need expensive treatments like blackout curtains or shades that cost hundreds of dollars. Your windows are already there, so why not use them? Even if you’re renting an apartment with no control over how much light comes into your unit, there are simple things you can do to create more natural lighting:
- Open blinds and curtains during daylight hours so that they catch as much sun as possible
- If it’s warm enough outside, consider opening windows or sliding doors so you can let in fresh air without having to turn on the AC (and save money).
Don’t be afraid of negative space
The point of minimalism is to reduce your possessions, but this doesn’t mean you have to fill every inch of your home with furniture and accessories. Negative space can actually be more meaningful than having things on display.
Think about how much more spacious a room feels when there are fewer items, particularly bulky ones such as couches and bookcases. The less clutter you have, the less crowded it feels! You also get a better view of what’s in front of you or above your head when there isn’t anything blocking them.
Negative space can help draw attention to other areas around your house too—like artwork or plants that need water (a sign for someone who might not watch their plants as carefully). It also helps create a calm atmosphere by encouraging people to relax instead of constantly worrying about where they should put something else on top of what already exists somewhere else in their home.
Conclusion
I hope you enjoyed reading “5 Ideas to Create a Beautiful Cozy Minimalist Home.” As long as you have a comfortable home, it doesn’t matter if it is a cozy minimalist home. The important thing to remember when it comes to interior design is to make your home beautiful and functional for you and the people who live in it.
*Disclosure: This post may contain affiliate links, which means that I get a commission if you decide to make a purchase through my links, at no cost to you. Please read full disclosure here.
*Disclosure: This post may contain affiliate links, which means that I get a commission if you decide to make a purchase through my links, at no cost to you. Please read full disclosure here.
]]>10 Helpful Small Pantry Organization to maximize your space
We live in a world where cleanliness is next to godliness. And we need to do everything that we can to make our space cleaner, more efficient and organized. If you’re the kind of person who is messy and has...
10 Helpful Small Pantry Organization to maximize your space
Shakita
10 Helpful Small Pantry Organization to maximize your space
We live in a world where cleanliness is next to godliness. And we need to do everything that we can to make our space cleaner, more efficient and organized. If you’re the kind of person who is messy and has a hard time keeping things in order when it comes to your kitchen, living room or anywhere else for that matter, then this article is for you. In this article you are going to learn how to maximize your space with these 10 helpful small pantry organization tips!
*Disclosure: This post may contain affiliate links, which means that I get a commission if you decide to make a purchase through my links, at no cost to you. Please read full disclosure here.
- 1. Take inventory
- 2. Be sure to label everything
- 3. Get creative with small containers
- 4. Store in clear bins or containers
- 5. Maximize your storage space with Lazy Susan's
- 6. Line the shelves
- 7. Simplify meal planning by keeping like items together
- 8. Keep your pet food in an airtight container or out of sight
- 9. Make your pantry functional
- 10. Use risers for cans and jars
- Conclusion
1. Take inventory
Don’t let those tiny spaces in your kitchen go to waste, take inventory of the items you have and make a list of what you need or want. Now that you have an idea of what is needed and not needed, it’s time to shop! But before shopping, do some research on how much space is available in your pantry so you can be more strategic with how much food you purchase. This small pantry organization step will keep your pantry from piling up with unused items over time.
2. Be sure to label everything
Labels are an essential tool for making the most of your small pantry organization. Not only do they help you find what you need at a glance when the urge strikes to bake a batch of cupcakes, but they also make it easier to find expired ingredients and restock them before you’re elbow-deep in flour with no baking soda on hand. There are many ways to label, but here’s one method that we recommend: use a label maker. This is a system that’s easy to maintain and will prove useful even as your pantry organization evolves over time.
Here’s a few ways to label your food items:
- Label by name
- Label with an expiration date
- Label the list of ingredients (for allergy purposes).
3. Get creative with small containers
Realistically, your small pantry might not have the space for all of your groceries. In that case, consider getting creative with your storage containers by switching to smaller containers for things like spices or snacks. This will help you make the most of your space without needing to throw out any perfectly good food—just store it in smaller quantities than usual. Plus, a small container is an excellent excuse to eat up those leftover chips before they get stale.
4. Store in clear bins or containers

In a small pantry, clear containers are your best friend. It’s easier to see what you have (so there’s no hoarding again), and it makes putting things away a breeze. It also keeps food fresher longer, because the lid creates an airtight seal that prevents moisture and bugs from creeping in.
Opt for clear bins or containers for dry ingredients like flour, sugar, oats, grains and rice. They’re stackable and easy to move when necessary. You can use them for cans and jars too!
5. Maximize your storage space with Lazy Susan’s
Lazy Susan’s are a must-have for your small pantry organization! These spinning wonders are a great way to store small items. You can use them in the corners of your pantry or on the shelves to store spices, canned goods and snacks. They can be found at just about any home improvement store or online.
It doesn’t matter if you have a large or small pantry, Lazy Susan’s are great for maximizing your storage space.
6. Line the shelves
A great way to make your pantry look nicer and be more functional is to use some type of contact paper or shelf liner on the shelves. This can make the shelves appear cleaner by covering stains, allow you to wipe up spills more easily and cost less than purchasing a new set of shelves. You don’t have to use boring white paper either. Shelves liners come in fun patterns and colors that can match your kitchen decor.
7. Simplify meal planning by keeping like items together
A helpful hack for small pantry organization is to keep like items together. Think about it: what’s easier, picking up a can of chicken noodle soup and knowing you have the egg noodles and broth at home, or needing to run out to buy all three ingredients? When everything you need is in the same place, you save time, money and stress.
To take this idea further, try arranging your pantry by category rather than alphabetically. Keep baking items together: flour, brown sugar, baking soda and more within reaching distance of one another. Canned fruit and vegetables are next door. Canned meats are right around the corner. Spices are right there too! You get the idea.
8. Keep your pet food in an airtight container or out of sight
While you may think it’s tempting to leave your pet food in its original bag, that actually makes it more accessible to pests. This can be true whether or not you have a pet. Since animal and people food is so similar, this can attract pets too.
Keep all of your pet food out of sight, closed up in an airtight pet food container, and off the ground on a shelf. If you want to keep your pantries looking tidy and organized, place all of your pet food in a decorative canister or bin with a seal-tight lid. You will appreciate how much less messy your pantry looks when you label and organize every last container!
9. Make your pantry functional
There are a few basic rules that apply to any small pantry organization, no matter what the room’s size or shape is. First, your pantry should be organized in such a way that those items you use most often are within easy reach and view. Meanwhile, those things you need less often should be placed in the back of the pantry.
Another rule is to put heavier items on lower shelves and lighter items above them so that it is easier for you to lift/lower them. Finally, if there are items that you use daily (for example, your coffee maker), these things should be kept on display nearby so that they can easily be accessed when needed
10. Use risers for cans and jars
Many pantries have deep shelves that make it difficult to see what’s in the back. The solution is to use risers—wire racks that elevate cans and jars so you can fit more in one spot. Risers are perfect for canned food, which tends to be heavy and bulky; they help prevent toppling by organizing items into neat rows.
If you want to take it a step further, stack smaller items on top of the cans or jars as well; then, when you take something off one of the bottom rows, you’ll find something new behind it!
Conclusion
I hope you enjoyed reading this post on “10 Helpful Small Pantry Organization to maximize your space.” Small pantry organization is ideal for people who want to make the most out of the space in their kitchen. Having proper small pantry organization can help you save so much money, improve efficiency, and even provide more space for your everyday cooking processes, too.
10 Helpful Small Pantry Organization to maximize your space
Shakita